Very EATalian

food, photography, italy

  • Home
  • About me
  • Recipes
    • Appetizers
    • Breakfast
    • Cheese & eggs
    • Desserts & Sweets
    • Drinks
    • Fish & Seafood
    • Holidays
    • Meat
    • Pasta & Gnocchi
    • Pizza & Bread
    • Rice & Grains
    • Side Dishes
    • Soups
    • Vegetarian
  • Italy
    • Behind the scenes
    • Life in Italy
    • Travel
  • Contact
  • SEARCH

Pizza Bianca with Ricotta, Zucchini Blossoms, Baby Zucchini and Anchovies

May 6, 2020 By very EATalian Leave a Comment

Jump to Recipe

How many of you eat pizza on Fridays? I certainly do, and it’s one of those few sure things in life. It’s a sacred weekly date I try to protect from any possible interfering events.

Seriously, eating pizza on Fridays is a long-standing tradition in my family and it started as a reward for helping my dad with cleaning his office on late Friday afternoons. We’d pick up a huge pie of pizza on the way home and it was a real treat! It was the early 90s and take-out food wasn’t as popular as it is now.

Let’s rewind a few years back, to the 80s, when my mom would make pizza straight out of a box. Is anybody familiar with Pizza Catari’? It’s basically a pizza-making set which became popular in the 60s; it included flour, yeast and a can of tomato sauce! People loved it because it was super convenient and required little or no leavening time. The taste was somewhat distinctive and I remember it was fun taking things out of the box and helping my mom making it! Well, that was then…The good ol’ 80s. Thankfully, at some point, my mom started making pizza the more “orthodox” way — with selected and high-quality ingredients, and a technique she perfected over the years.

The tradition of eating pizza on Fridays is still alive and we alternate between making our own, and ordering it from our favorite local pizzeria. Believe it or not, between the two, my mom’s pizza is the one I prefer!

BREAKING OUT OF MY COMFORT ZONE: A TOMATO-LESS PIZZA!

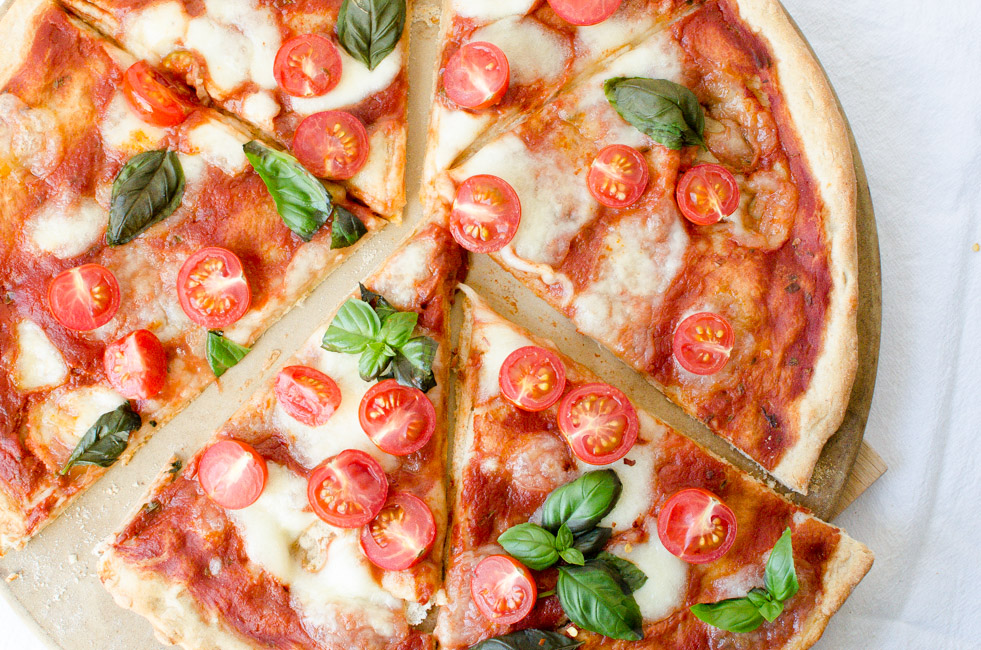
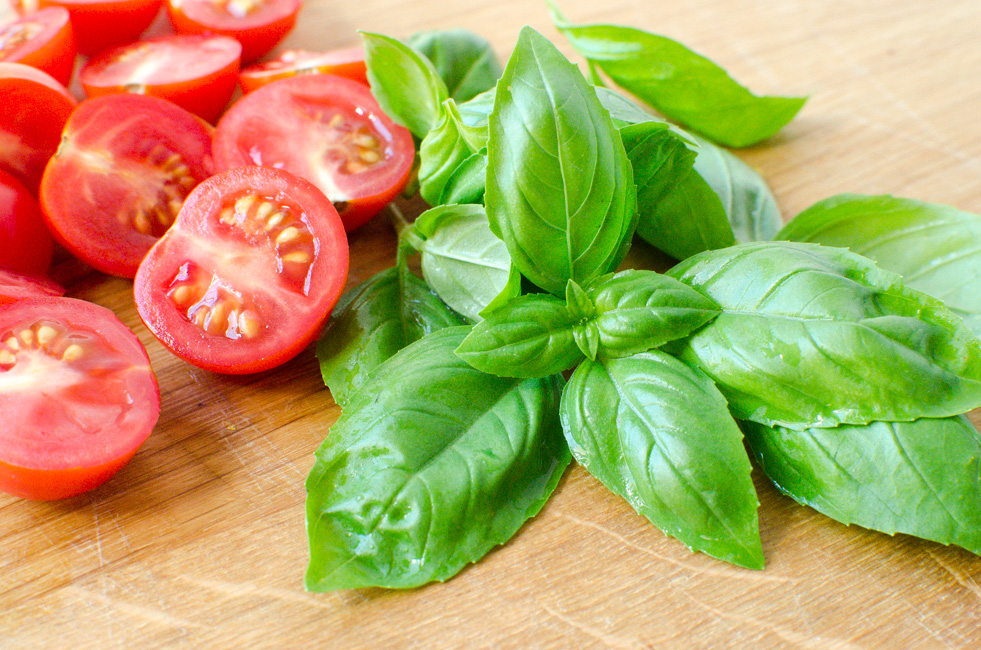
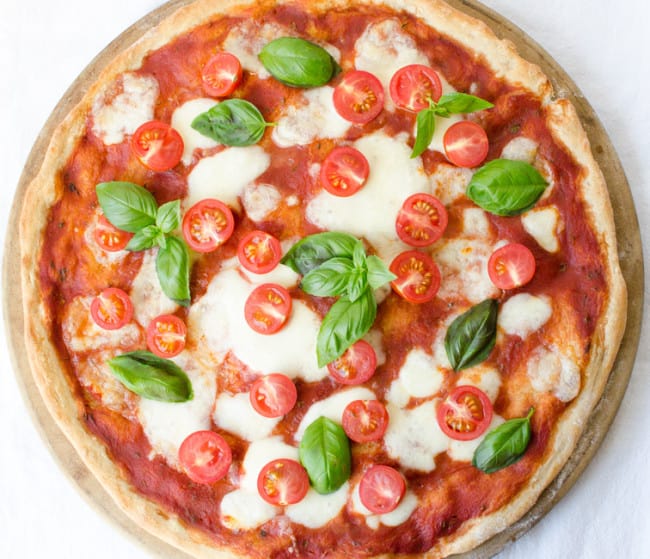
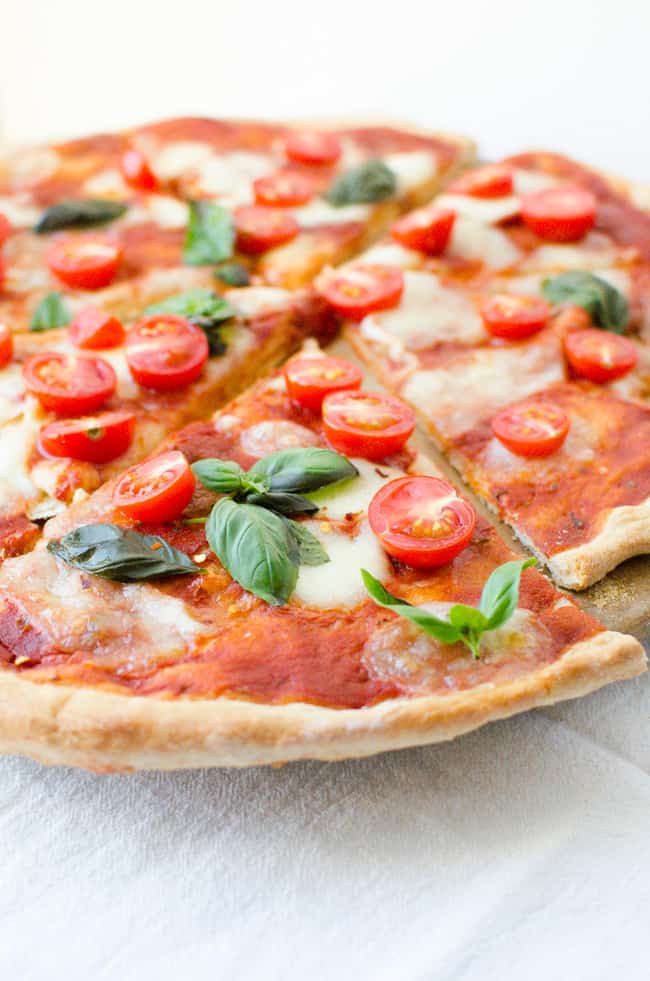
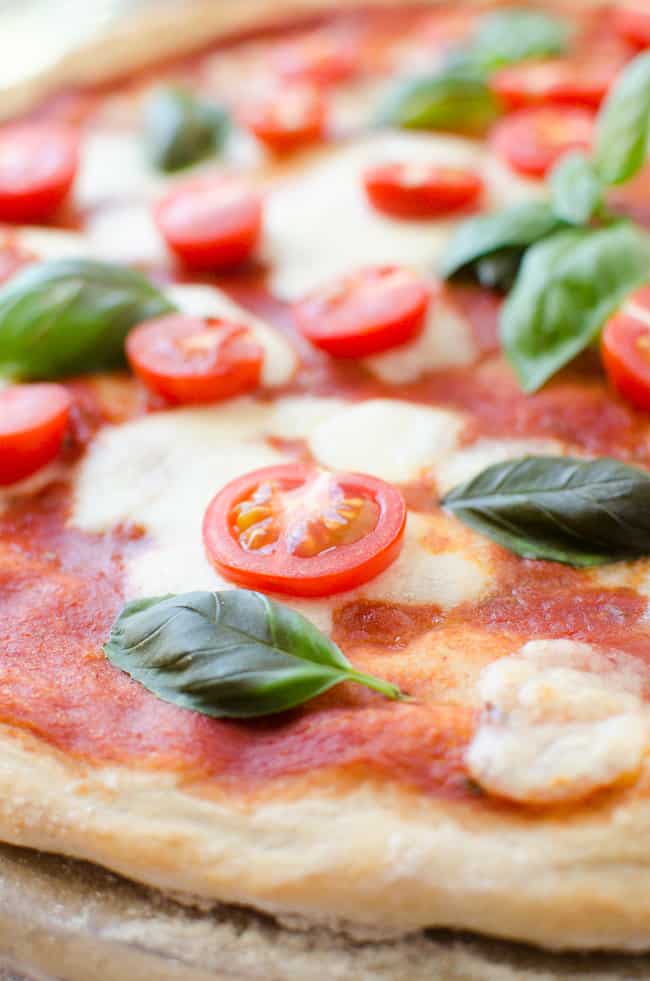
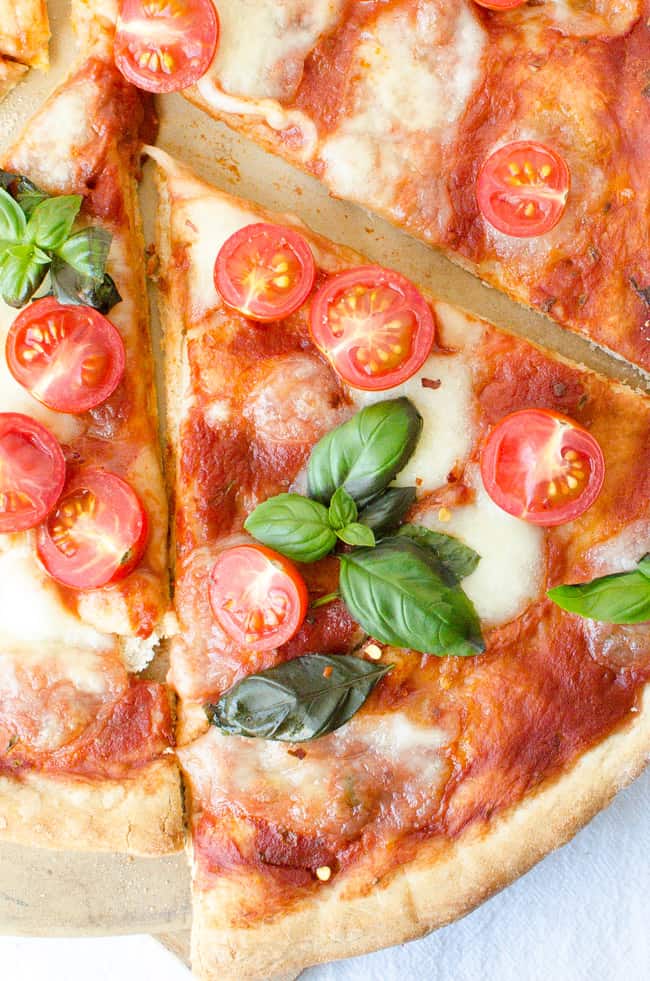
When I eat pizza out, I love a thin and floppy crust in the center, with a puffy cornicione (rim). My toppings of choice are usually buffalo mozzarella and fresh cherry tomatoes. If I feel fancy, I ask for prosciutto crudo to be added at the very end.

When we’re home, I love a thick, puffy crust pizza with blistered mozzarella and a bunch of toppings. My favorite topping combos: pepper-onion-and-sausage, tuna & onion, ham & mushrooms, or…wait for it…. sliced hotdogs (Viennese). I make this one out of nostalgia because it was my favorite when I was a little kid!

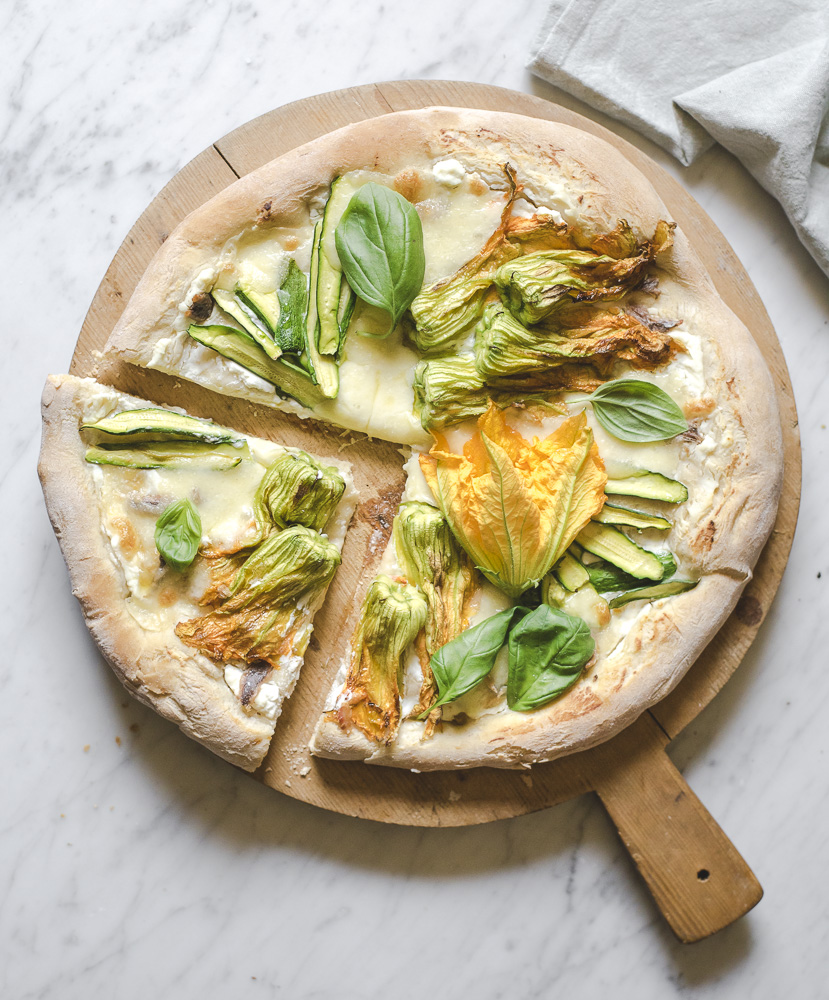
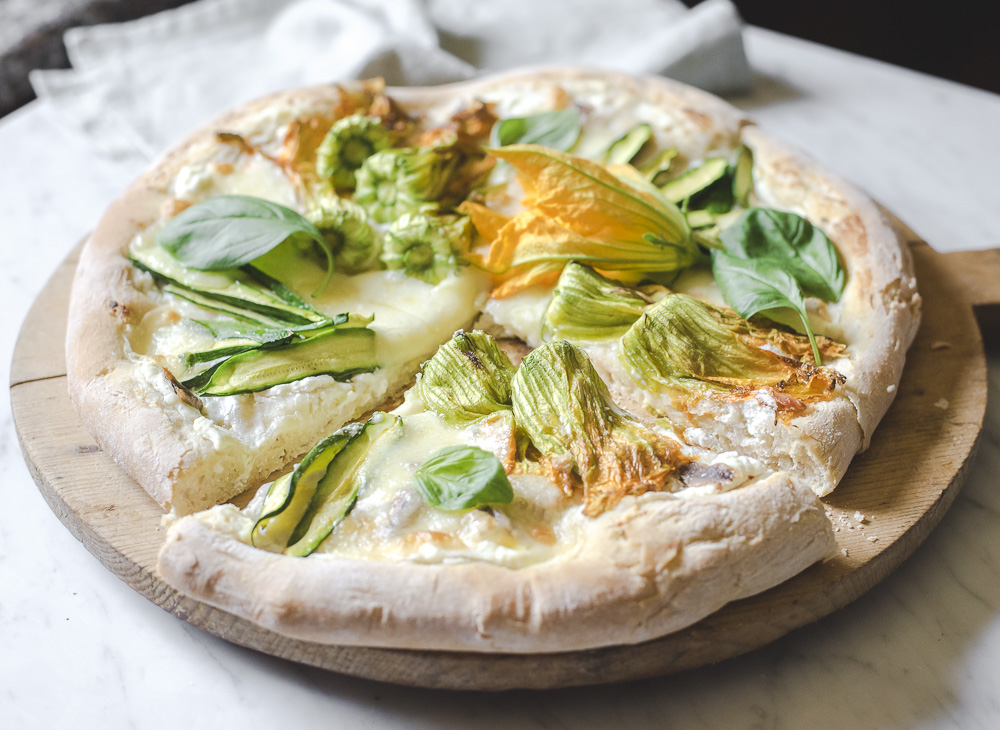
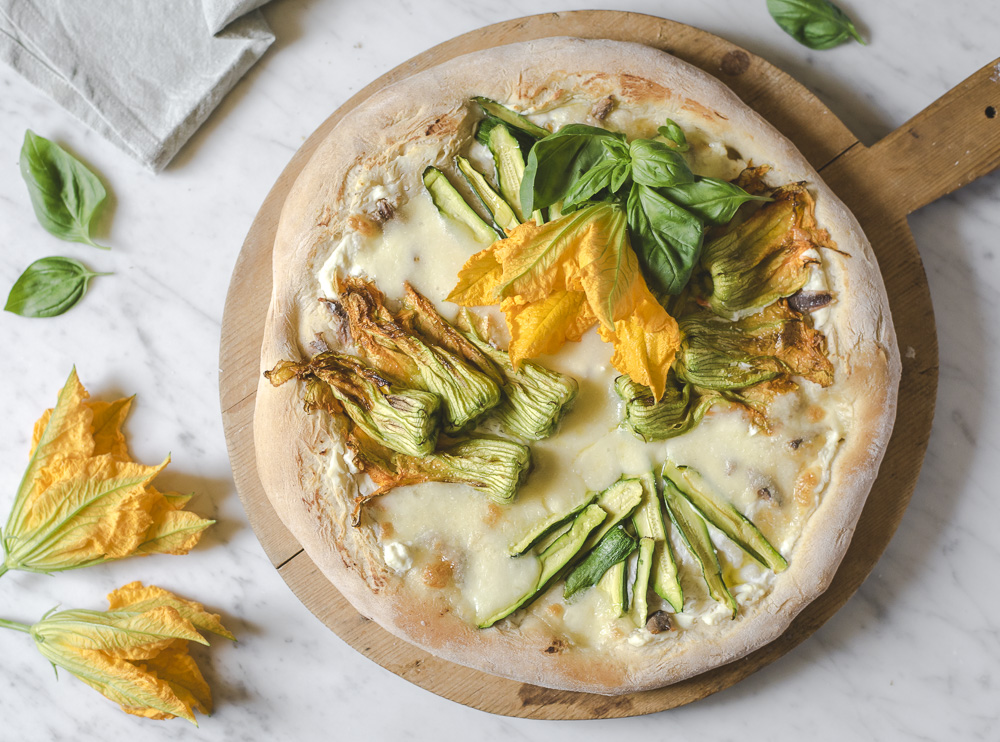
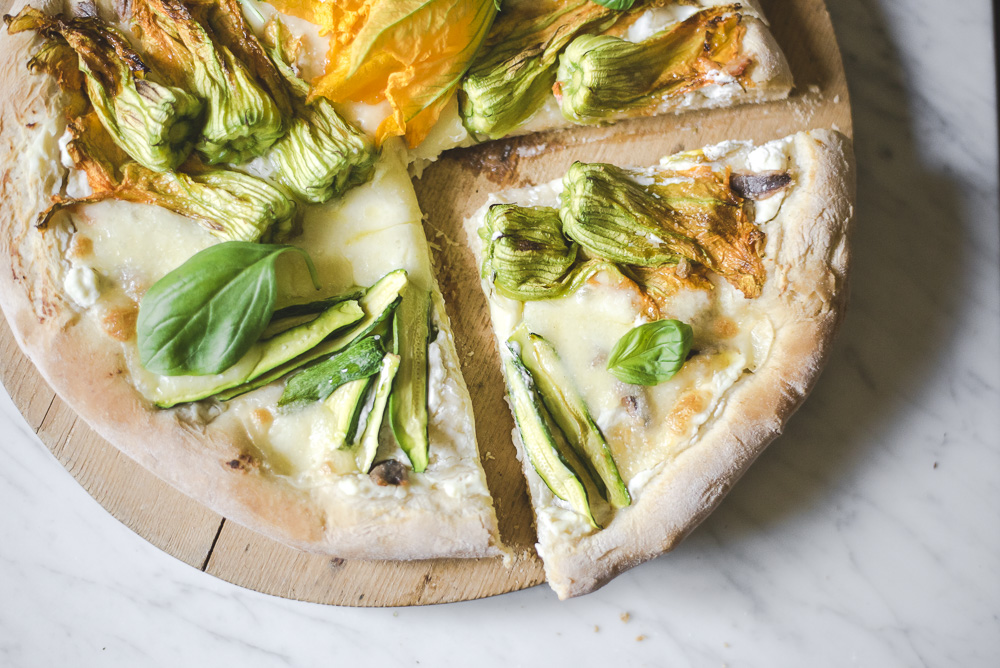
This time I definitely stepped out of my comfort zone and I made a “Pizza Bianca”, using my mom’s dough recipe. I replaced the traditional tomato sauce with a layer of ricotta, some mozzarella and little bits of anchovy fillets. I then arranged the cutest baby zucchini and freshly picked zucchini blossoms on top. It turned out to be the springiest, prettiest, and freshest pizza I’ve ever made!

SOME TRICKS I LEARNED FROM MY MOM

While there’s certainly room for improvement and there’s so much to learn in the pizza-making department, I’m pretty happy with this recipe. It yields an airy and puffy crust with a crispy bottom — that’s how I like to eat it at home! Here below are some of the tricks I learnt from my mom, hoping they’ll be useful for you too.

Kneading the dough: I knead the dough for about 5-10 minutes (depending on how energetic I feel). When the pizza dough feels as tender as your ear lobe (I know you’re touching it right now!), you’ll basically have obtained the right consistency. I cover the dough and let it rest in a warm place.

Using the right flour: Italian flours are classified by numbers according to how finely they are ground from the roughest ground “tipo” 2″, to “1”, to “0”, and the powder-fine “00”.  Ideally, for pizza, you should use a medium-strength “0” flour, if you can get a hold of it. If not, Caputo “00” flour works well too, or you could even mix bread flour and all-purpose flour.

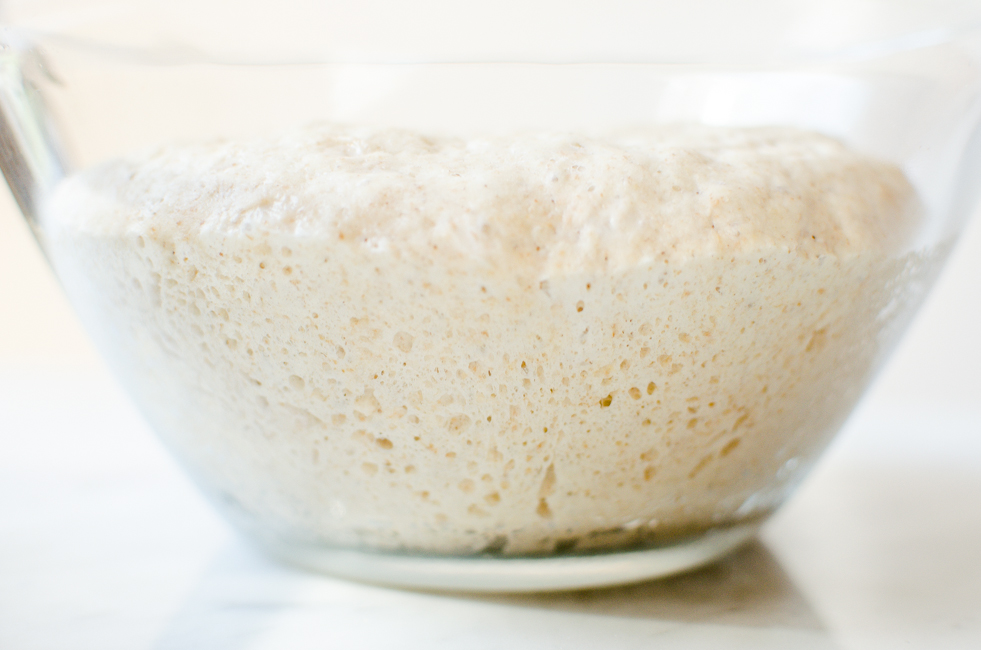
Proofing your dough: The longer the dough rests, the better it is. Pizzaioli let their dough rest for at least 24 hours (in the fridge). For this recipe, I opted for a shorter period of time: I used about half packet of yeast and I let the dough rest in a warm place for about 3 hours. Then I shaped the dough in the pan, covered it and let it rest another hour. The result was a nice light and puffy crust.

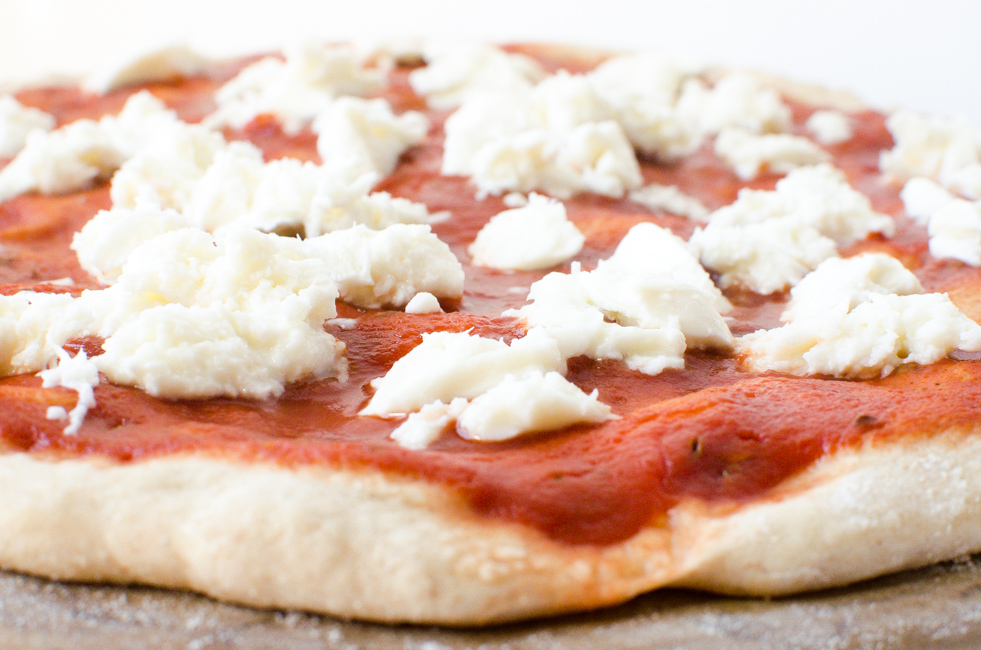
Baking : I bake my pizza at 250 C (485 F). To get a nice perfectly cooked crust, I place the pan at the very bottom of the oven for the first 8 minutes. Then I bring it up to the center of the oven to complete the baking. It’s generally recommended to add the toppings on the pizza (with the exception of tomato sauce) halfway through the baking. Sometimes I do that, sometimes I add everything at the beginning, sometimes I only add mozzarella halfway through. It’s totally up to you.

Ok now. Let’s make some pizza!

If you make this recipe, please let me know how it turns out for you! You can leave a comment below the recipe or share a photo on IG or FB. Don’t forget to tag me with #veryeatalian! Grazie!

Pizza Bianca with Ricotta, Zucchini Blossoms, Zucchini, and Anchovies | Very EATalian
Print

Pizza Bianca with Ricotta, Zucchini Blossoms, Baby Zucchini, and Anchovies

Cook Time 12 minutes
Resting Time 4 hours
Servings 2 people
Author Very EATalian

Ingredients

Dough

  • 500 g (4 cups) flour (250 g “Type 0” flour + 250 g “Type 1” flour; see notes for substitutions)
  • 300 g (1 ¼ cup) lukewarm water
  • 1/2 packet (3.5 g) instant dry yeast (I used Mastro Fornaio Pane Angeli)
  • 1 tsp sugar
  • 2 Tbsp extra-virgin olive oil
  • 1 tsp sea salt

Toppings

  • 200 g (7 oz) ricotta
  • 150 g (5 oz) low-moisture mozzarella
  • 4 baby zucchini (or 1 big zucchini) sliced
  • 8 zucchini blossoms
  • 6 anchovy fillets
  • Olive oil & salt for seasoning

Instructions

  1. In a medium bowl, add flour, water, yeast, sugar, and oil. Mix with your hands until combined, then transfer dough onto a clean surface. Knead dough until smooth, about 7 minutes. Add salt and continue kneading for 2-3 more minutes. When the dough is soft, shape it into a ball, and transfer it into a bowl. Cover with plastic wrap and let it rest in a warm place for 3 hours.

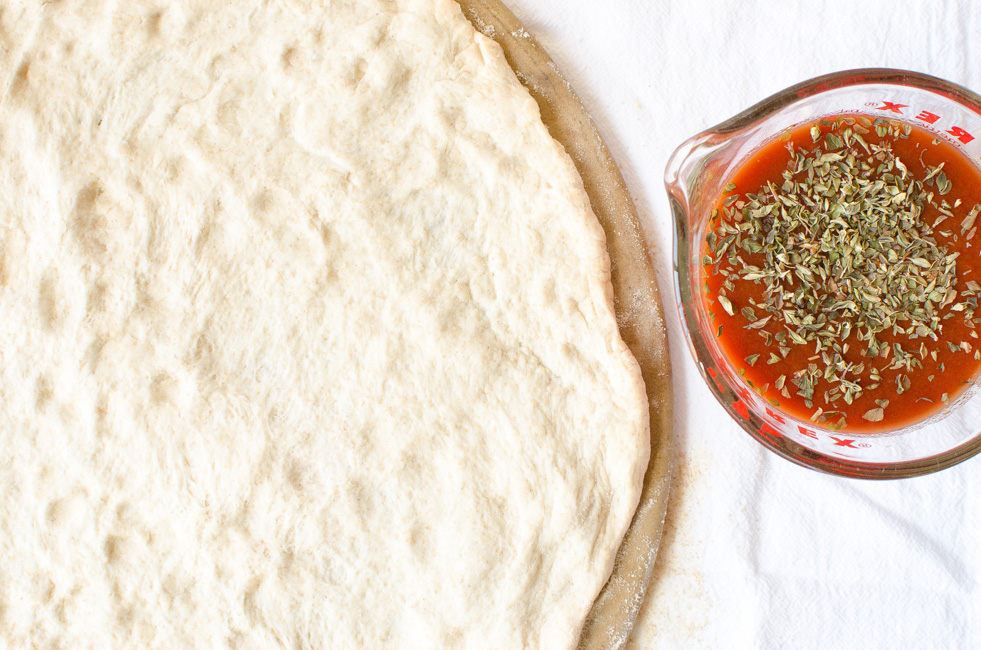
  2. Line a baking tray with parchment paper. Take your dough out of the bowl and transfer it on the floured counter. Using your hands, gently stretch and shape the dough to fit your baking tray, making sure not to stretch it too much. Transfer dough onto your baking tray, cover it, and let it rest for another hour.

  3. Turn oven to 250 C/ 485 F.

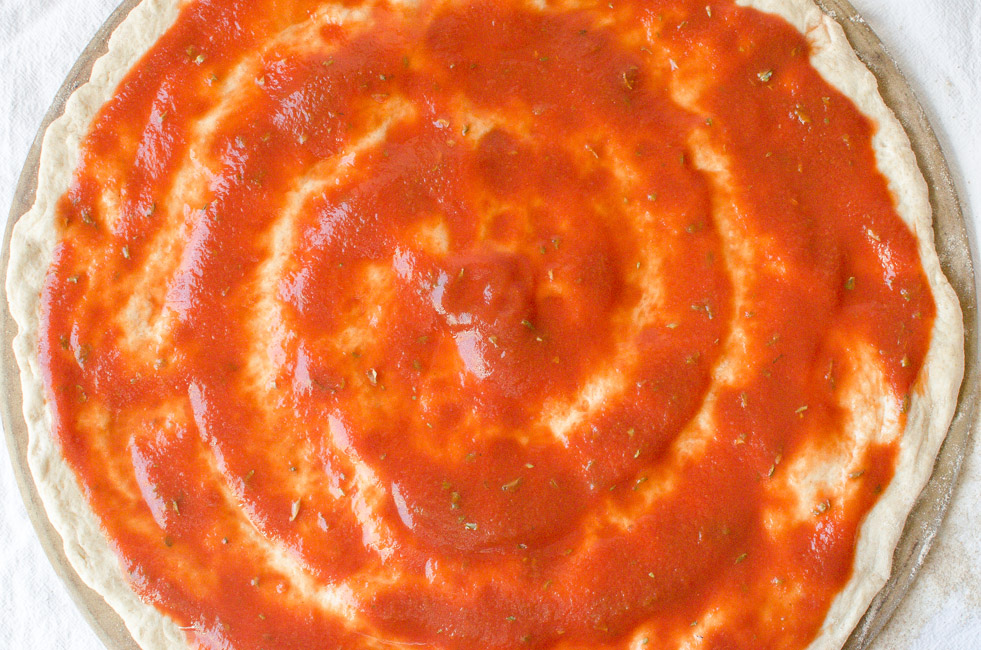
  4. Spoon your ricotta onto the shaped dough, leaving a 2 cm (3/4-inch) border. Season with salt. Arrange your zucchini flowers and baby zucchini slices on top. Drizzle with olive oil. Place the tray of pizza at the bottom of the oven and bake for 8 minutes. Remove from the oven and arrange mozzarella cheese evenly over pizza. Return tray to the center rack of the oven and bake until crust is golden (about 4-6 more minutes, depending on your oven). Top with basil, drizzle with more oil, if you like, and slice.

Notes

Servings: This pizza is for 2 generous servings or 3 smaller servings. Double the ingredients to feed 4-5 people. 

Flour: If you can’t find “Type 0” or “Type 1” Italian flour, you can substitute  with a mix of all-purpose and bread flour (50/50), or you could just use “Type 00” Italian flour (Antimo Caputo). 

Filed Under: Uncategorized Tagged With: pizza, ricotta, zucchini, zucchini blossoms

Pizza Margherita with Cherry Tomatoes

March 18, 2015 By very EATalian Leave a Comment

I’m a firm believer there’s only one pizza deserving of the name: a light, thin-crust pizza topped with just enough quality ingredients. No fancy deep dish pie, with cheese-filled crust or multi-layered toppings can compare to the wonderful, simple, and tasty delight of a traditional Italian pizza.

Pizza Margherita with Cherry Tomatoes | veryEATalian-2Now that you know how particular I am about this Italian “sacred food”, you’ll also be able to understand how frustrating it was for me to find a legitimate pizza once I left Italy. When my husband and I arrived here, we initially tried a couple of  restaurants claiming to serve the real Italian-style pizza. After tasting entirely burnt crusts and too-plastic-to-be-real-mozzarella, I decided it was just time to improve my own home-made pizza recipe.

Believe it or not, even for the average Italian home cook it’s quite hard to achieve a crust similar to the one you’d taste at a pizzeria–one with a great wood oven to give the crust incredible flavor and texture. Unfortunately, I’m a regular person with a regular kitchen…and no plans for installing a commercial pizza oven. However, after a bit of research and a couple of adjustments, I think I’ve managed to achieve a pretty legit home-style pizza.

There are a few tricks you need to know and I included them in the recipe below. I didn’t bother adding a bunch of toppings; for good pizza you just need a couple of high-quality ingredients. The key is keeping it simple!

Pizza Margherita with Cherry Tomatoes | veryEATalian-5
Pizza Margherita with Cherry Tomatoes | veryEATalian-6
Pizza Margherita with Cherry Tomatoes | veryEATalian-7
Pizza Margherita with Cherry Tomatoes | veryEATalian
Pizza Margherita with Cherry Tomatoes | veryEATalian-11
Pizza Margherita with Cherry Tomatoes | veryEATalian-8
Pizza Margherita with Cherry Tomatoes | veryEATalian-9
Pizza Margherita with Cherry Tomatoes | veryEATalian-3
Pizza Margherita with Cherry Tomatoes | veryEATalian-10
Pizza Margherita with Cherry Tomatoes | veryEATalian-13
Pizza Margherita with Cherry Tomatoes | veryEATalian-4
PIZZA MARGHERITA WITH CHERRY TOMATOES
Servings: 2 | Prep time: 20 min | Rest time: 2 hours | Bake time: 16 min

NOTE: In this recipe I used two different types of flour. You can use just one, as long as you keep the  same ratio of flour/water (250 g/150 ml). Once again, I recommend using a digital scale to achieve best results!

Recommended equipment: 15″ pizza stone

INGREDIENTS
200 g (7 oz) finely milled Italian flour (Tipo “00”) or all-purpose flour
50 g (1.8 oz) whole wheat flour
150 ml (5 oz) lukewarm water
3.5 gr (1/2 packet) active dry yeast
1 tsp sugar
1/2 tsp salt + 1/2 tsp salt for the sauce
200 ml (6.7 oz) unsalted strained tomatoes — the best quality you can find
a sprinkle of dry oregano
200 g (7 oz) mozzarella cheese (ovoline or bocconcini), drained and shredded — the best quality you can find
10 cherry tomatoes, halved
10-12 basil leaves

INSTRUCTIONS
1. Dissolve yeast and sugar in a glass of lukewarm water. Sift the flour in a medium-sized bowl and add the yeast/water/sugar mixture in it. Work the dough with your hands and knead until all ingredients are well incorporated. Add salt.
2. Take the dough onto a clean work surface and start kneading until it reaches a soft, elastic, and smooth texture.  Take the dough and bang it on the work surface, about 6-7 times. Form the dough into a ball and place it in a bowl, covered with a clean dishtowel. Let it rest for 2 hours in a dry place.
3. While the dough is resting, prepare the tomato sauce by combining the strained tomatoes with 1/2 tsp of salt, 1 tsp of sugar and a sprinkle of oregano.
4. After the dough has rested, turn oven to 450°F. Dust the pizza stone generously with flour. Take the dough, form a small disk with your hands and start pulling out the sides, stretching it until it covers the whole pizza stone [don’t overwork it!]
5. Spread the tomato sauce on the pizza dough with a spoon, leaving an edge for the crust. Bake for about 8 minutes.
6. Remove pizza from the oven, sprinkle the shredded mozzarella on top and bake pizza for 6 more minutes.
7. Remove from the oven and add cherry tomato halves, cut side-up. Bake for 2 more minutes, until the mozzarella is lightly brown-colored and the crust is golden.
8. Remove pizza from the oven. Add fresh basil leaves on top and let it sit for about 5 minutes before serving.

Buon appetito!

-Lisa

Filed Under: Pizza & Bread, Vegetarian Tagged With: basil, cherry tomatoes, mozzarella, pizza

  • Bloglovin
  • Facebook
  • Instagram
  • Pinterest
  • Tumblr
  • Twitter

WELCOME!

WELCOME!

I'm Lisa and this is where I like to share Italian recipes and stories about my Italian family. If you'd like to learn more about me, head over to my About page.

[F O L L O W • M E • O N • B L O G L O V I N' ]

Recipes from Friuli Venezia Giulia

Creamy Polenta with Grana Padano Cheese Fondue | Very EATalian

More Posts from this Category

Pasta & Gnocchi

Spaghetti with Tuna, Lemon and Creamy Stracciatella, Cheese | Very EATalian
Simple and flavorful Pasta e Ceci (Pasta with Chickpeas) | Very EATalian
Orecchiette with Sausage, Broccoli Rabe, and Sun-dried Tomatoes | Very EATalian
Butternut squash ravioli with sage and amaretti cookie crumbles

More Posts from this Category

Sweets & Dessert

Ciambelle al Vino: Crunchy Wine Cookies | Very EATalian
Jam-filled Pasta Frolla Cookies! Buttery, sweet and tart, they're versatile and perfect for Valentine's Day!
Crostoli: a perfectly crisp Carnevale Treat | Very EATalian

More Posts from this Category

Thanksgiving in Italy

September: time to harvest grapes to make “Il Vino del Nonno”

Trip to Sicily

Tasting Frittelle in Venice

Behind the Scenes of a Grappa Distillery

Behind the Scenes of an Artisanal Fresh Pasta Shop

STAY CONNECTED!
  • Bloglovin
  • Facebook
  • Instagram
  • Pinterest
  • Tumblr
  • Twitter
All recipes, written content, and photographs on this website have been created exclusively for Very EATalian (unless otherwise noted) and are protected by copyright. You may not use any content from this website for commercial use without express permission from the author.
Creative Commons License
This work is licensed under a Creative Commons Attribution-NonCommercial-ShareAlike 3.0 Unported License.

© 2025 Very EATalian. All rights reserved