Very EATalian

food, photography, italy

  • Home
  • About me
  • Recipes
    • Appetizers
    • Breakfast
    • Cheese & eggs
    • Desserts & Sweets
    • Drinks
    • Fish & Seafood
    • Holidays
    • Meat
    • Pasta & Gnocchi
    • Pizza & Bread
    • Rice & Grains
    • Side Dishes
    • Soups
    • Vegetarian
  • Italy
    • Behind the scenes
    • Life in Italy
    • Travel
  • Contact
  • SEARCH

Sicilian Pasta with Sardines

August 10, 2015 By very EATalian Leave a Comment

Sicilian Pasta with Sardines | veryEATalian

Sicilian Pasta with Sardines | veryEATalian

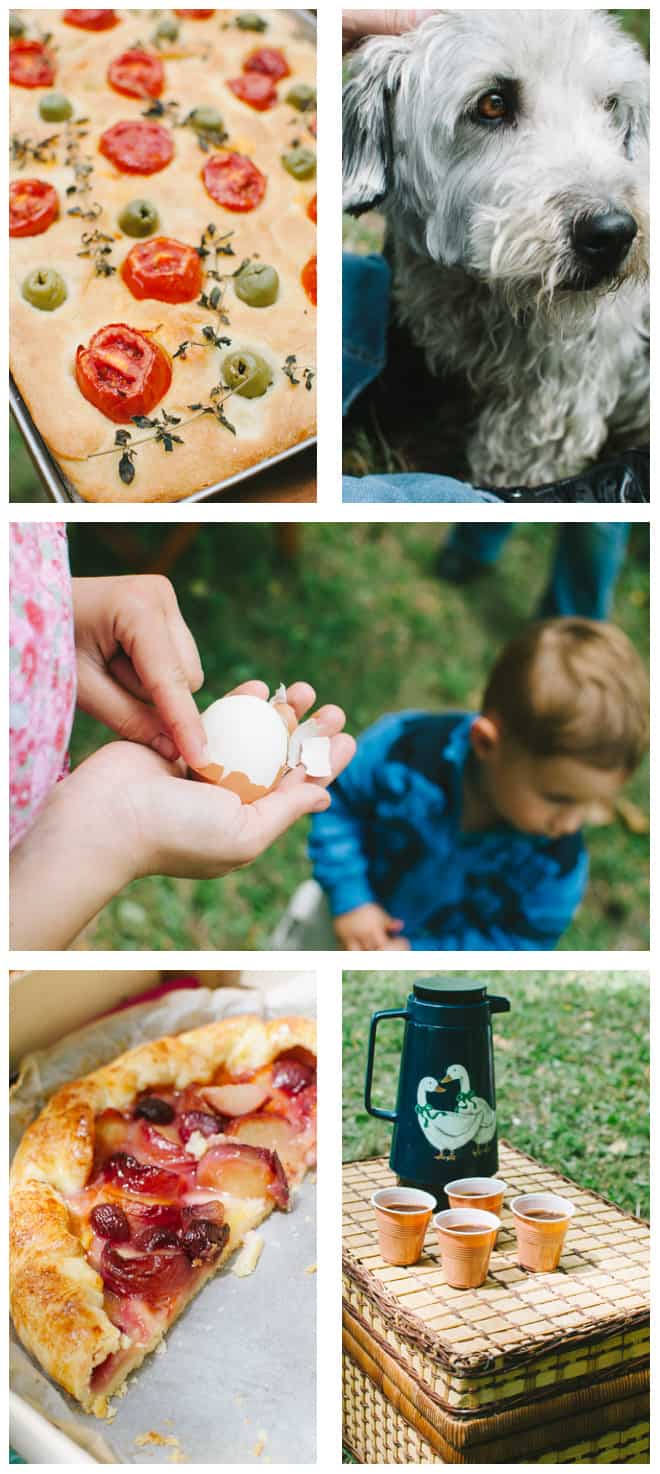
These days I’m a little obsessed with Sicilian cuisine, mostly because I recently met a lady who, just like me, is married to a Sicilian man and has a great passion for food. It didn’t take a long time until she started sharing recipes she inherited from her mother-in-law. Few days later, a bunch of Sicilian ingredients started flowing into my kitchen.

When I told her I wanted to make Pasta con le Sarde (one of Sicily’s signature dishes), she sent me two key ingredients to make it: a bag of uvetta passolina from Palermo (Zante currants) and a bunch of finocchietto selvatico (wild fennel).  As if that wasn’t kind enough, she also included a handwritten recipe. I love it when people take time to write. I love it even more if they write about food!

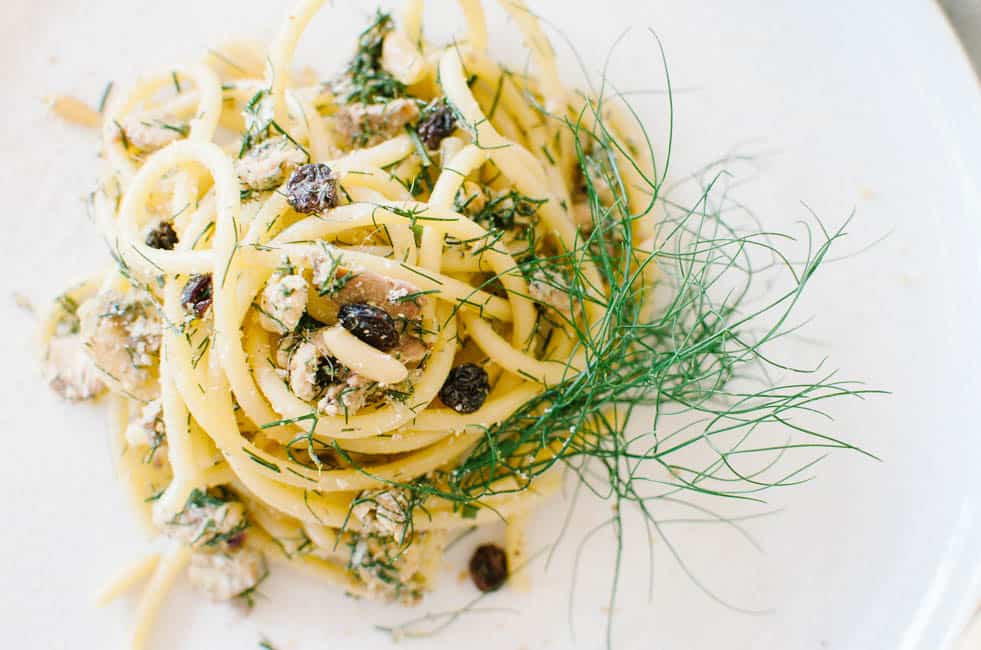
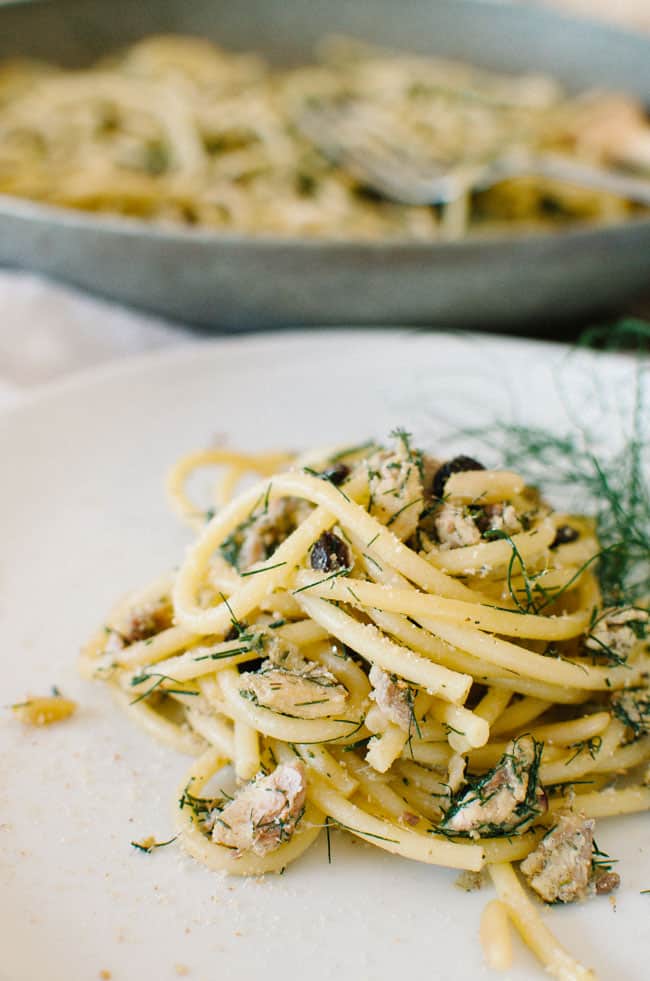
Pasta con Sarde, as the names suggests, is made with sardines. Sardines are plentiful in Sicily and much cheaper than other fish – it’s no wonder it’s used in many peasant cooking dishes. The recipe also includes other ingredients such as pine nuts, anchovies, onion, and saffron…sounds Middle Eastern, doesn’t it? The legend says the recipe was created by the cooks of an Arab conqueror who landed in Sicily back in 827. The cooks, in an effort to muster up food for the troops, caught sardines in the harbor, harvested wild fennel, currants and pine nuts from the surrounding land and combined all the ingredients, creating a unique and intriguing flavor palette… it’s sweet and salty, slightly tangy, and definitely aromatic. It perfectly represents Sicily, a beautiful island with such a peculiar heritage.

Everybody loved it here. My dad had seconds and even had leftovers the following day! That’s another great things about this pasta…It makes great leftovers; just make sure you cook it al dente to begin with. Then, the next day, sprinkle it with some slivered almonds and bake it for a few minutes. I know some of these ingredients aren’t available in other parts of the world but you can easily substitute wild fennel with regular fennel and Zante currants with raisins. Unless you’re able to travel to Palermo, that’s the easiest way to bring a little bit of Sicily to your table.

Wild Fennel - Sicilian Pasta with Sardines | veryEATalian
Sicilian Pasta with Sardines | veryEATalian

Sicilian Pasta with Sardines | veryEATalian

Sicilian Pasta con le Sarde
 
Print
Prep time
25 mins
Cook time
20 mins
Total time
45 mins
 
Recipe type: Pasta
Serves: 4
Ingredients
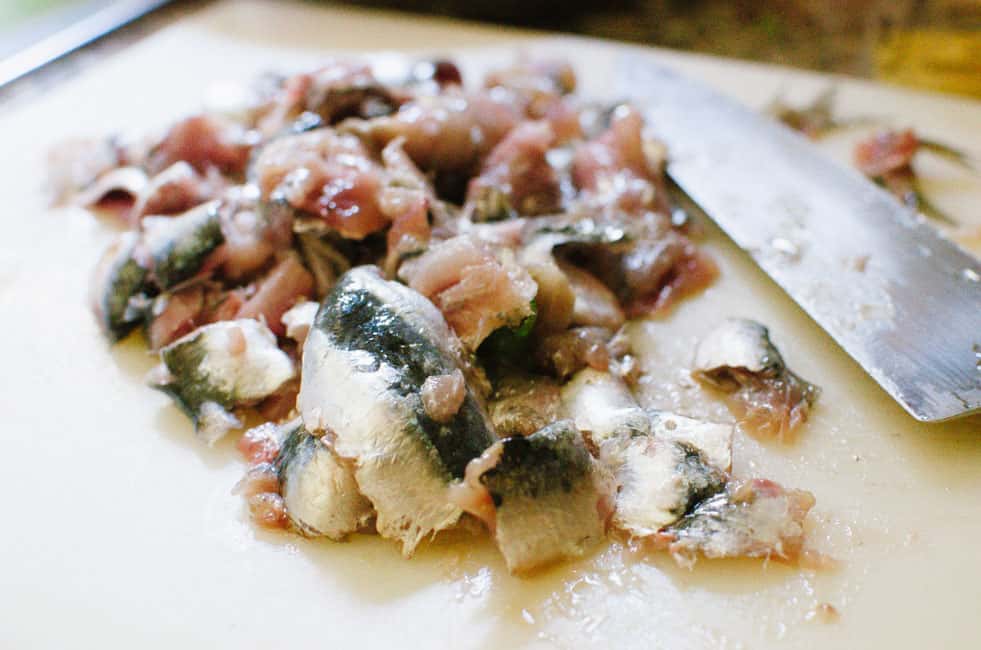
  • 1 lb (450 g) whole fresh sardines
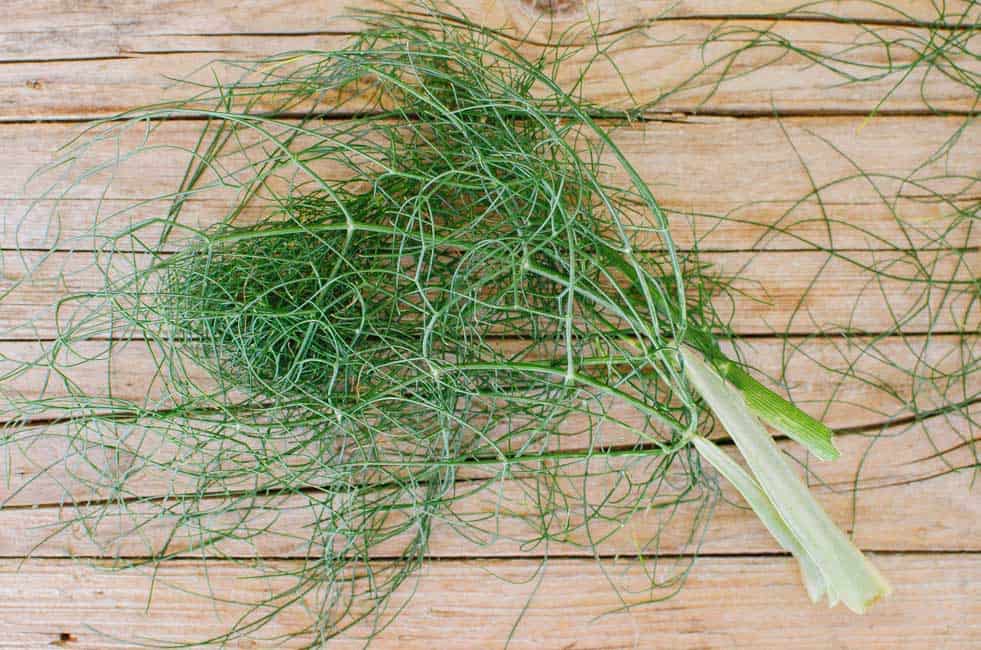
  • a bunch of wild fennel (or 3 baby fennel bulbs, fronds included)
  • 1 medium onion, chopped
  • a handful of Zante currants
  • 3 anchovy fillets
  • ⅓ cup (40 g) pine nuts
  • a pinch of saffron
  • 320 g bucatini pasta
  • 2 Tbsp toasted breadcrumbs
  • salt
  • pepper
Instructions
  1. Clean sardines: Rinse sardines under cold water, gently scraping the skin toward the head to remove the scales. Remove head by pulling it backward, toward the spine. Hold the fish with one hand and with the other, pull the backbone from the head, carefully lifting it up and away from the fillet; discard it. Rinse each fillet under cold water and set aside.
  2. Discard rough parts of wild fennel and boil fronds in water for a few minutes until softer (if using regular fennel, cook it until tender - about 10 minutes). With a slotted spoon, drain fennel, reserving cooking water. Roughly chop fennel.
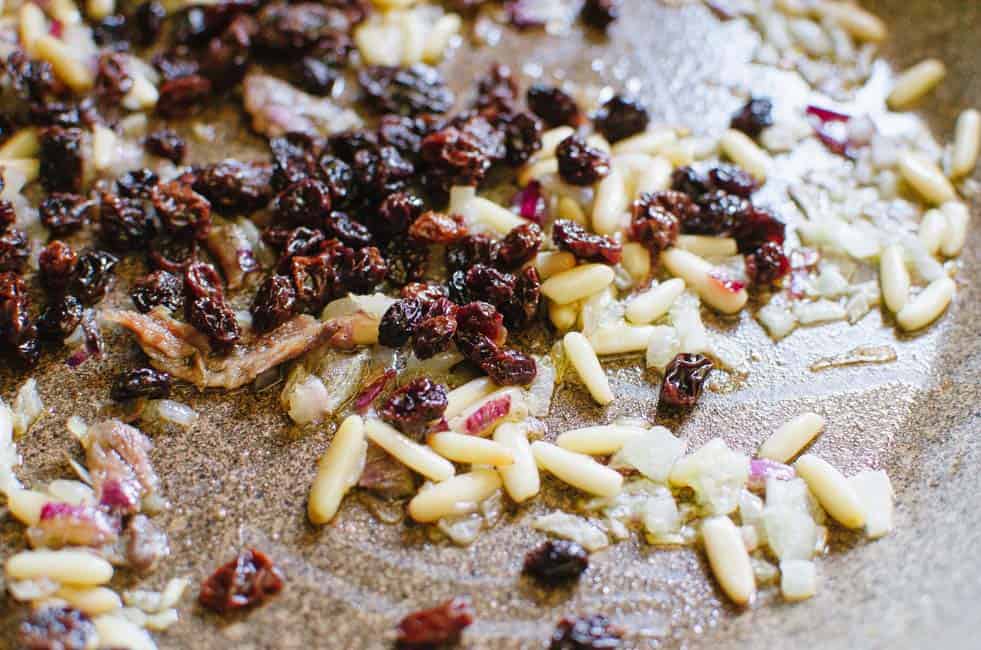
  3. Sauté chopped onion until translucent, add anchovies, pine nuts, zante currants, chopped fennel. Cook for a few minutes, adding salt and pepper to taste. Add ½ cup or more of cooking water and let it evaporate (you'll want to get a moist condiment). In a small glass mix saffron with a bit of water and then add to the pan containing the rest of the ingredients.
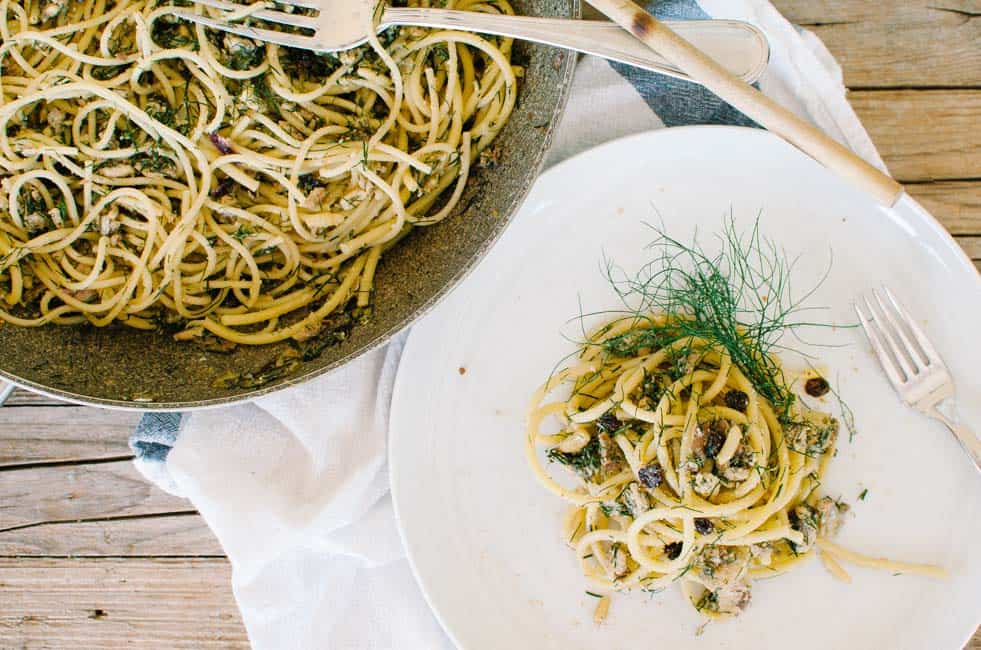
  4. Cook bucatini pasta in the cooking water you reserved. While pasta is boiling, add chopped sardines in the pan containing the condiment. Cook for few minutes (you don't want the sardines to be over-cooked).
  5. When pasta is al dente, drain it and toss it in the pan (reserving a cup of cooking water). Mix well and sprinkle with some toasted breadcrumbs. Add cooking water as needed, to prevent the pasta to become dry. Let it rest a couple of minutes and serve.
3.3.3077


Filed Under: Fish & Seafood, Pasta & Gnocchi Tagged With: pasta with sardines, sardines, sicilian recipes

Day Trip to Venice

July 28, 2015 By very EATalian Leave a Comment

Day trip to Venice: train ride | veryEATalian

Day trip to Venice: pretty scene | veryEATalian

Last Saturday, around noon, my friend Roby asked me if I was interested taking a day trip to Venice to see Henri Rousseau’s exhibit at the Doge’s Palace. I’m usually not good at being spontaneous, but I really wanted to take a break from household chores and spend some quality time with a dear friend; wandering around the alleys of one of the most beautiful cities in the world (conveniently located at an hour train ride from home) wasn’t a bad idea either. We were in Venice by 4 pm.

We took our time walking around, getting lost, chatting, snapping silly pictures, looking at beautiful paintings, and drinking aperitivo on our way to a late dinner. Then we caught the last train back home.

We had a great time together. It was like floating on a timeless friendship cloud. Luckily I had my camera with me and I was able to freeze the beauty surrounding us.

Day trip to Venice: water reflections at St. Mark's square | veryEATalian
Day trip to Venice: Doge's Palace | veryEATalian
Day trip to Venice: people-watcher | veryEATalian
Day trip to Venice: dancing solar flowers at Ca' Foscari courtyard | veryEATalian
Day trip to Venice: tourists taking a break| veryEATalian

Day trip to Venice: Canal Grande - Great Canal | veryEATalian
Day trip to Venice: love graffiti | veryEATalian

Filed Under: Travel Tagged With: friendship, travel, venice

Homemade Peach Jam

July 20, 2015 By very EATalian Leave a Comment

Homemade Peach Jam | veryEATalian

I’m not sure how my dad ended up buying 70 euro worth of peaches the other day…but he did. When he triumphantly opened the trunk of his car showing us (with much pride) the purchase he made, my mom and I didn’t exactly react the way he was expecting we would.

How the heck are we gonna eat all those peaches before they go bad?? 

It turned out the gazillion of baskets he brought home didn’t only contain peaches, but they were also hiding a bunch of nectarines and plums. There was no way we could eat them all. So we kept some to eat, we gave some away and with the remainder I made a LOT of jam (3 kinds of jams, to be exact). Because of the unfortunate timing (these days the weather here in Italy is incredibly hot … and, no, I don’t have AC in the kitchen) and the colossal amount of fruit, making jam turned out to be a real enterprise. I’m sure it won’t be the case for you, if you decide to do it! It’s fun, rewarding, and not difficult at all…It only takes 3 ingredients, 2 or 3 hours of your time, and some stirring.

We typically eat jam for breakfast – with bread and butter – but it can be used as filling for lots of desserts (cookies, crepes, crostatas, galettes…you name it). You can even use it to glaze meat or simply pair it with cheese. I like to buy plain yogurt and add a a dollop of jam in it (I prefer it over any other “naturally” flavored commercial versions).

Bottom line: be creative with it. Jam is pretty versatile. And pretty darn delicious.

When life gives you (tons of) peaches… make jam!

Homemade Peach Jam | veryEATalian
How to Make Peach Jam | veryEATalian
Homemade Peach Jam | veryEATalian
Italian Breakfast with Peach Jam | veryEATalian

Homemade Peach Jam
 
Print
Prep time
20 mins
Cook time
2 hours
Total time
2 hours 20 mins
 
Recipe type: Spread
Serves: 10-12 half pint jars
Ingredients
  • 3 kg (6.6 lb) peaches, washed well
  • 1.2 kg (2.6 lb) sugar
  • 1½ lemons
Instructions
  1. Cut peaches in slices and discard pits.
  2. Place cut peaches in a big pot over medium heat. After a couple of minutes, add sugar and lemon. Stir occasionally and bring to a full boil.
  3. Cook peaches until very soft, stirring often to prevent scorching. Once peaches have become quite mushy (this will require a couple of hours), blend them using a handheld blender (this will make make the mixture denser). The jam is done when it falls heavily from the spoon. If not done, continue cooking and try again.
  4. Transfer hot jam into hot sterilized jars (*see notes) using a clean jam funnel. Fill hot jars, leaving ½ inch headspace. Screw sterilized lids on to seal jars. Turn jars upside down and let them reach room temperature.
Notes
-Although I didn't do it for my jam, it's always better to blanch fruit and peel it, before cutting it.
-I sterilized the empty jars by placing them in the oven at 265F for about 15 minutes. I also boiled the lids for a few minutes. Please check safety standards and canning guidelines here: http://nchfp.uga.edu//publications/publications_usda.html
3.3.3077

Filed Under: Breakfast Tagged With: jam, Peach Jam, peaches, spread

Crispy Fried Zucchini Blossoms

July 12, 2015 By very EATalian 6 Comments

Crispy Fried Zucchini Blossoms | veryEATalian
Crispy Fried Zucchini Blossoms | veryEATalianWhen summer comes around, zucchini blossoms are among the most exciting veggies you can find at the local farmer’s market or in the produce aisle of a grocery store. I picked the ones you see featured in this post from my mom’s garden. I gotta say, if they didn’t spoil so quickly, they’d make a nice little bouquet! Not only are they beautiful, they also make a sweet and colorful addition to a risotto or a pasta dish.

Zucchini blossoms can be enjoyed in so many ways, but “their best death”, as Italians say, is in the frying pan – you’ll get a nice, crispy, sweet, and delicate fritter. Some people like to add sugar to the batter… I personally like to skip the extra sugar and add, instead, a final sprinkle of salt to contrast their natural sweet flavor.

They’re perfect as appetizer or side dish. If you want to splurge, stuff them with a little piece of mozzarella before you dredge them in batter and fry them. Then remember to thank me.

Crispy Fried Zucchini Blossoms | veryEATalian

Crispy Fried Zucchini Blossoms | veryEATalian

4.5 from 2 reviews
Crispy Fried Zucchini Blossoms
 
Print
Prep time
15 mins
Cook time
3 mins
Total time
18 mins
 
Recipe type: Appetizer
Serves: 4
Ingredients
  • 12 zucchini blossoms
  • 1 egg
  • ½ cup milk
  • flour, as needed
  • a pinch of baking soda (or, even better, 2 tablespoons of beer - if you have it)
  • peanut oil
  • coarse salt
Instructions
  1. In a small bowl, beat an egg. Whisk in milk and a pinch of soda (or beer). Add enough flour to achieve a dense consistency (think pancake batter). Whisk batter until most lumps are gone but do not over-whisk.
  2. In a large pot, heat about 1 inch of peanut oil to 350°F (175°C).
  3. Dredge each blossom in batter, shaking off the excess and lay it in the oil (it's better to fry few at a time). Once they have cooked on one side, flip them with a slotted spoon, until golden brown.
  4. Drain them on dish lined with paper towel. Sprinkle with coarse salt and enjoy them while they're hot!
3.3.3077

Filed Under: Appetizers, Vegetarian Tagged With: appetizers, fried zucchini blossoms, zucchini blossoms

Marinated Fresh Anchovies Crostini

July 9, 2015 By very EATalian

Marinated Fresh Anchovies Crostini | veryEATalianIf the speed rate at which something disappears from the table is a good indication of “deliciousness”, then these crostini beat any other antipasto we have at our big family dinners; people DO fight over them. In Italian, they’re called Crostini con Alici Fresche Marinate and they’re, quite simply, toasted bread with marinated fresh anchovies on top.

If you’re thinking of the taste of canned anchovies, please erase the thought and rewind. These anchovies taste fresh, meaty and with a nice tartness. This recipe requires a bit of patience but it’s totally worth trying it: after cleaning the fish, you marinate it in vinegar for 4 hours and then you simply dress it with extra-virgin olive oil, garlic, parsley, and lemon juice. Next step: lay a couple of marinated fillets on a slice of crispy toasted bread…et voilà: you’ve got a nice appetizer that bursts with flavor.

It’s hard to believe such a small fish is packed with so much flavor and nutrients! We’re big fans of pesce azzurro (anchovies, sardines, mackerel, herring, etc.) around here. It’s cheap(er), rich in healthy unsaturated fats, and super tasty! Love, love, love it.

Marinated Fresh Anchovies Crostini-5
Marinated Fresh Anchovies Crostini-6
Tasty Fresh Anchovies Crostini | veryEATalian

Tasty Marinated Fresh Anchovies Crostini
 
Print
Prep time
5 hours
Total time
5 hours
 
Serves: 8-10
Ingredients
  • 1 pound fresh anchovies
  • 2 cups (or more) of apple cider vinegar
  • 1 lemon, juiced
  • ¼ cup of parsley, finely chopped
  • 2 garlic cloves, finely chopped
  • sea salt
  • 2 cups (or more) of extra-virgin olive oil
  • bread, sliced and toasted
Instructions
  1. How to clean anchovies: Hold the fish with one hand. With the other hand, pinch right below the head, snap it and pull most of the innards. Slit the belly with your finger and remove the remaining innards. Rinse the fish under cold water. Flatten the fish and remove the spine with the tail. Repeat for the rest of the anchovies.
  2. Place clean fillets in a flat bottom bowl and add enough vinegar to cover them. Cover dish with plastic film and refrigerate for at least 4 hours.
  3. Rinse each fillet with a bit of vinegar to wash away any residue. (Anchovies will be soft and breakable--use extra caution during this step!). Place each rinsed anchovy side by side in another flat bottom bowl or deep dish. Once you formed the first layer, sprinkle some lemon juice, minced garlic, salt, and vinegar on top . Proceed with the next layers and repeat the same steps.
  4. Cover anchovies with extra-virgin olive oil.
  5. Slice bread and toast it on a pan. Lay anchovies on top of toasted bread and serve.
3.3.3077

Filed Under: Appetizers, Fish & Seafood Tagged With: anchovies, appetizer, crostini, fish

Torta Caprese: Gluten-free Chocolate Almond Cake

July 1, 2015 By very EATalian Leave a Comment

Torta Caprese - Gluten-free Chocolate Almond Cake | veryEATalianA couple of days ago I tried to make my husband’s birthday special with a little family celebration via Skype. I had everybody wear party hats and I drew a colorful poster as a background for our performance of a loud-and-out-of-tune Happy Birthday. Since I was at it, I also made a nice cake for the occasion. He loved the singing and the poster part. I’m pretty sure he hated me for showing him a cake he couldn’t eat.

Who makes a birthday cake for somebody when they can only see it and not taste it?

How painful, I know…But I’m a firm believer there’s no birthday without a cake…so I HAD to make it.

The cake I made was Torta Caprese and it’s hands down one of my favorite chocolate cakes. As the name suggests, this cake comes from the gorgeous Island of Capri, near Naples. Unlike most cakes, Torta Caprese has no flour but lots of ground almonds which give it a nice texture throughout. Also, there’s no baking powder in it – it’s leavened only by whipped egg whites.  I read somewhere this recipe was created by mistake: the lack of flour was a complete accident made by a sleepy pastry chef. What a fortunate oversight! It’s at once light, rich, and moist…plus, chocolate and almonds are just made for each other.

This cake is definitely a no-frills cake and it’s so simple and delicious it perfectly stands on its own. All this cake begs for is a nice dusting of powdered sugar on top of its crispy and thin crust – a nice finishing touch to make it beautiful and elegant. If you really want to do something extra, have an espresso with it!

Here are the photos of the cake I made to torture celebrate my hubby!

[TANTI AUGURI, amoreeee!]

Torta Caprese - Gluten-free Chocolate Almond Cake | veryEATalian

Torta Caprese - Gluten-free Chocolate Almond Cake
 
Print
Prep time
30 mins
Cook time
50 mins
Total time
1 hour 20 mins
 
Serves: 8-10
Ingredients
  • 200 g (13 Tbsp + 1 tsp) butter, diced and softened
  • 180 g (6.3 oz OR 1 scant cup) sugar (divided)
  • a pinch of salt
  • 4 eggs
  • 150 g (5.3 oz) dark chocolate
  • 200 g (7 oz) almonds, toasted
  • powdered sugar
Instructions
  1. Divide yolks from egg whites.
  2. Cream softened butter with 140 g (2/3 cup) of sugar. Add salt and yolks, one at a time. Mix well to blend all the ingredients. Refrigerate the mixture.
  3. Using a food processor, ground toasted almonds.
  4. Preheat oven to 360 F (180 C).
  5. Melt chocolate on a double boiler. Once melted, let it reach room temperature.
  6. In a separate bowl, whip egg whites with the rest of the sugar to stiff peaks.
  7. Add melted chocolate and ground almonds to butter mixture. Mix well. With a spatula, gently fold egg whites into mixture.
  8. Pour batter into a greased 7-inch (18 cm) spring form pan and bake for 50 minutes. Remove from oven and let it cool off. Dust with powdered sugar and serve.
Notes
The cake should be moist inside.

Adapted from Sale&Pepe: http://www.salepepe.it/ricette/dolci-dessert/torte-crostate/torte/torta-caprese/
3.3.3077

Filed Under: Desserts & Sweets Tagged With: almonds, cake, Chocolate, dessert, flourless, gluten free, torta

Rustic Peach Crostata and a Picnic in my Dad’s Orchard

June 22, 2015 By very EATalian Leave a Comment

Rustic Peach Crostata |veryEATalianI’m a HUGE fan of picnics—perhaps, I’m the most enthusiastic “picnic-ER” you’ll ever meet and I have tons of good memories from past family outings. When I was little, I used to love singing in the car with my parents. Then, as I grew older, the excitement was mainly for the games we’d play all together, or the places we explored and hiked. These days, it’s simply about enjoying each other’s company in the middle of nature. Food definitely plays a good part in making the whole event more pleasant.

Ever since I got back to Italy, I’ve been wanting to go on a picnic with the whole family SO badly. Unfortunately, not everybody’s schedule seems to line up (at least for this month)…so I tried to compensate. A few days ago, despite the chilly weather, I decided to gather whomever was around, grab a table and a few chairs and set out an impromptu picnic in my dad’s orchard, a few steps beyond our fence. It’s definitely not a wild or picturesque mountain scenery, nonetheless a nice and enjoyable place–conveniently located next door! I’m surprised it took us so many years to realize it’s more than just a place for foraging or taking walks.

Picnic in the Orchard | veryEATalianMy mom and I teamed up and prepared all the food in the morning. We made a farro salad with sautéed veggies, a nice and soft focaccia bread, a few crispy eggplant fritters, and a beautiful rustic peach crostata. Not bad for an improvised get-together! We also quickly boiled a few eggs (a must for any picnic) and we packed them up in our cute picnic basket (I love that thing!). I made coffee as well, as I really wanted to use this tacky-but-kinda-adorable coffee thermos I found in the basement. Then, I loaded a couple of folding chairs, a little table and a couple of blankets on a wheel barrel and I carried everything to the orchard. The rest of the group followed me with the food.

We had a fun and relaxing lunch and it was so nice to be together, under the shade of my dad’s trees. It’s a meaningful place for my family as those trees were planted by my dad and grandfather. They were little twigs and now they’re full sized trees! Amazing.

Everybody raved about my crostata. The crust was nicely colored and perfectly textured: it was buttery, delicate, and flaky. I used Saturn peaches as filling and was able balance their very sweet flavor with a good amount of lemon juice and the tartness of a few cherries. Visually speaking, the crostata is colorful and imperfectly beautiful…in a word: rustic!! This recipe is absolutely a keeper and I’ll definitely make it again soon, before peach season is over.

Picnic in the Orchard | veryEATalian
Rustic Peach Crostata |veryEATalian

Rustic Peach Crostata
 
Print
Prep time
1 hour 45 mins
Cook time
55 mins
Total time
2 hours 40 mins
 
Author: Adapted from Bon Appétit, July 2002
Serves: 8-10
Ingredients
  • -CRUST
  • 1⅔ cups (210 g) all-purpose flour
  • ¼ cup (42 g) polenta flour (coarse cornmeal)
  • 3 Tbsp (42 g) sugar
  • ¼ lemon peel, grated (use about ½ lemon)
  • ¾ tsp (4 g) salt
  • 14 Tbsp (200 g) chilled unsalted butter, cut into ½-inch cubes
  • ⅓ cup (75 ml) ice water
  • -FILLING
  • ¼ cup (57 g) sugar
  • 1½ tsp (5 g) cornstarch
  • 4 medium saturn peaches, each pitted and cut into slices
  • a handful of cherries, pitted
  • ½ lemon, juiced
  • ½ tsp vanilla extract
  • 1 egg, beaten
  • Raw sugar crystals
  • Peach preserves, heated
Instructions
  1. Combine the first 5 ingredients in a processor and blend for 5 seconds. Add butter and blend just until butter is reduced to pea-size pieces. Add ice water. Blend until dough comes together in moist clumps (adding more water if dough is dry). Form a ball (adding more flour, if necessary) and flatten into disk. Wrap and chill for at least 1 hour.
  2. Let dough soften slightly at room temperature and roll it on lightly floured sheet of parchment paper, turning it occasionally to prevent sticking. Transfer onto a round baking pan (the edges will probably stick out). Chill until dough firms slightly, about 15 minutes.
  3. Mix fruit, sugar, cornstarch, lemon juice, and vanilla in a bowl. Let stand until juices are released, stirring fruit occasionally, about 10 minutes.
  4. Preheat oven to 375°F. Take dough out of the fridge. Spoon fruit and juices into center of dough leaving out the edges. Lift about 2 inches of dough border and fold it down over fruit. Brush folded border with egg glaze; sprinkle with raw sugar.
  5. Bake until crust is golden brown and fruit filling is bubbling, about 55 minutes. Remove from oven and brush fruit with peach preserves. Serve warm or at room temperature.
Notes
To ensure a flaky crust, be careful not to overwork the butter.
3.3.3077

Filed Under: Desserts & Sweets, Life in Italy Tagged With: crostata, dessert, peach crostata, peaches, tart

  • « Previous Page
  • 1
  • …
  • 8
  • 9
  • 10
  • 11
  • 12
  • …
  • 14
  • Next Page »
  • Bloglovin
  • Facebook
  • Instagram
  • Pinterest
  • Tumblr
  • Twitter

WELCOME!

WELCOME!

I'm Lisa and this is where I like to share Italian recipes and stories about my Italian family. If you'd like to learn more about me, head over to my About page.

[F O L L O W • M E • O N • B L O G L O V I N' ]

Recipes from Friuli Venezia Giulia

Creamy Polenta with Grana Padano Cheese Fondue | Very EATalian

More Posts from this Category

Pasta & Gnocchi

Spaghetti with Tuna, Lemon and Creamy Stracciatella, Cheese | Very EATalian
Simple and flavorful Pasta e Ceci (Pasta with Chickpeas) | Very EATalian
Orecchiette with Sausage, Broccoli Rabe, and Sun-dried Tomatoes | Very EATalian
Butternut squash ravioli with sage and amaretti cookie crumbles

More Posts from this Category

Sweets & Dessert

Ciambelle al Vino: Crunchy Wine Cookies | Very EATalian
Jam-filled Pasta Frolla Cookies! Buttery, sweet and tart, they're versatile and perfect for Valentine's Day!
Crostoli: a perfectly crisp Carnevale Treat | Very EATalian

More Posts from this Category

Thanksgiving in Italy

September: time to harvest grapes to make “Il Vino del Nonno”

Trip to Sicily

Tasting Frittelle in Venice

Behind the Scenes of a Grappa Distillery

Behind the Scenes of an Artisanal Fresh Pasta Shop

STAY CONNECTED!
  • Bloglovin
  • Facebook
  • Instagram
  • Pinterest
  • Tumblr
  • Twitter
All recipes, written content, and photographs on this website have been created exclusively for Very EATalian (unless otherwise noted) and are protected by copyright. You may not use any content from this website for commercial use without express permission from the author.
Creative Commons License
This work is licensed under a Creative Commons Attribution-NonCommercial-ShareAlike 3.0 Unported License.

© 2025 Very EATalian. All rights reserved