Very EATalian

food, photography, italy

  • Home
  • About me
  • Recipes
    • Appetizers
    • Breakfast
    • Cheese & eggs
    • Desserts & Sweets
    • Drinks
    • Fish & Seafood
    • Holidays
    • Meat
    • Pasta & Gnocchi
    • Pizza & Bread
    • Rice & Grains
    • Side Dishes
    • Soups
    • Vegetarian
  • Italy
    • Behind the scenes
    • Life in Italy
    • Travel
  • Contact
  • SEARCH

Orzotto (Barley Risotto) with Dandelion Greens and Mascarpone Cheese

April 13, 2015 By very EATalian Leave a Comment

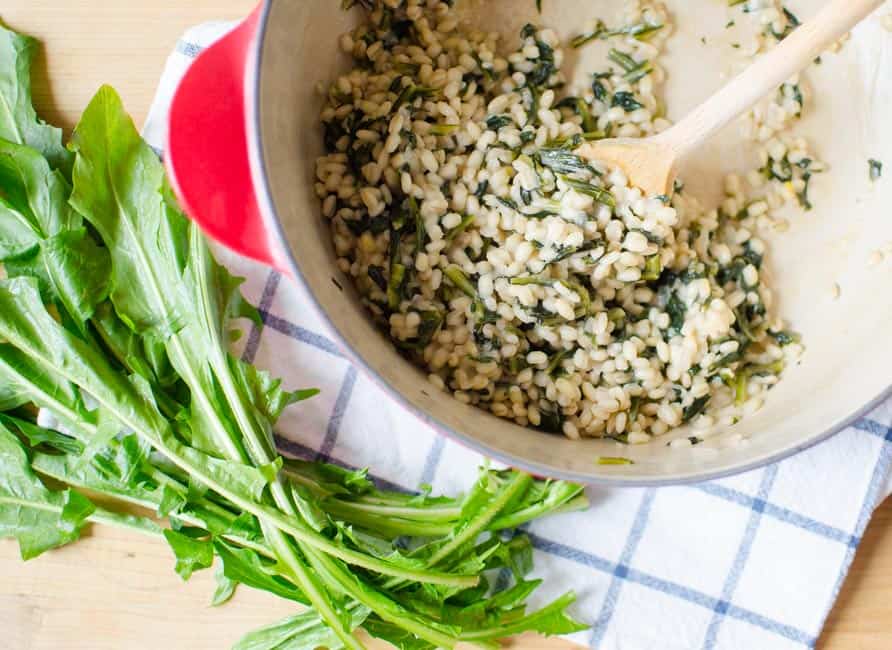
Orzotto with Dandelion Greens and Mascarpone Cheese | veryEATalian-8
Have you ever foraged for wild greens? I know it may sound a bit hippy, but I have–several times, actually! In Italy during the springtime, I used to tag along with my mom and aunts as they went through the open fields behind the house, looking for wild greens such as poppy and dandelion leaves. If we were lucky, we also found hop shoots and nettles. We usually left in the mid-afternoon and came back at dusk with bags full of green goodies which inevitably ended up in a nice risotto or a tasty frittata.

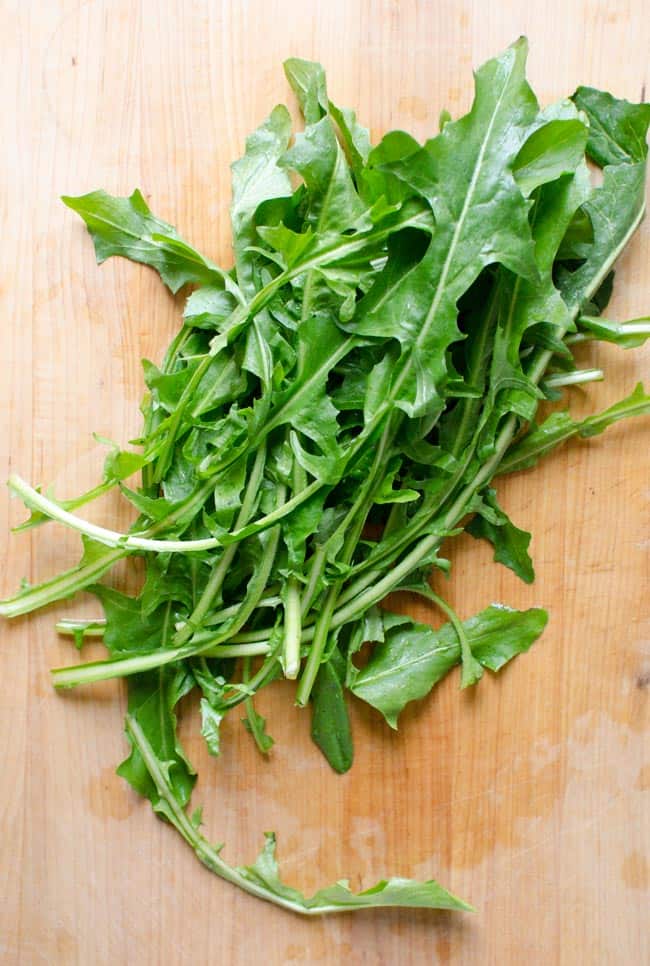
It’s a very frugal and nature-friendly way of eating, but you have to be able to recognize edible plants otherwise you may end up eating greens that simply taste bad or, even worse, are poisonous. The good news is you can enjoy these flavorful wild greens without becoming a foraging expert. Certain grocery stores and farmers markets occasionally carry them. For example, I found these beautiful dandelion leaves at The Fresh Market!

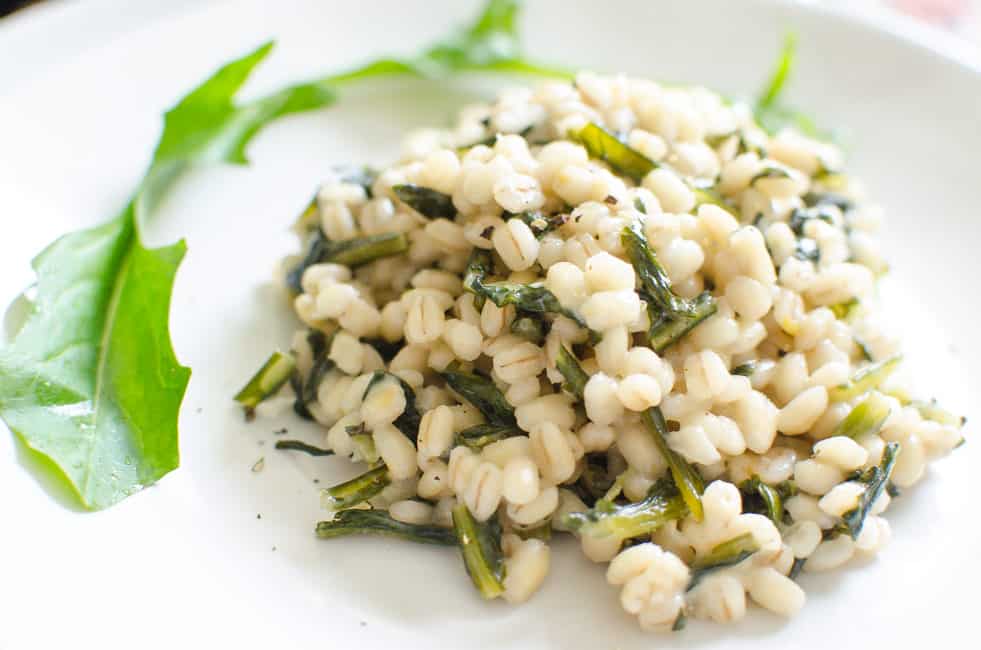
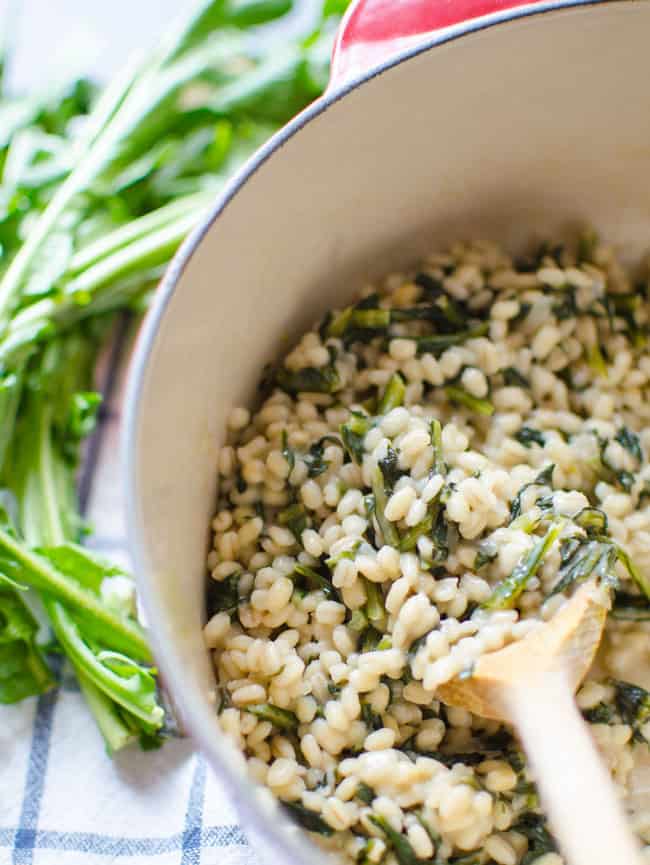
Dandelion greens are super nutritious: they are rich in iron and calcium and loaded with vitamins A, C and K. They can be a tad bitter but, when cooked, their sharp flavor gets milder. In this springtime recipe, I added dandelion greens to an orzotto, which is barley (orzo, in Italian) cooked the exact same way as rice in a more traditional risotto–by toasting the grain with sautéed onion or shallot, and then adding wine, followed by broth. The mascarpone cheese is a last-minute addition I made to further mitigate the bitterness of the dandelion greens. The orzotto turned out perfect: creamy, fresh, and delicate.
Orzotto with Dandelion Greens and Mascarpone Cheese | veryEATalian
Orzotto with Dandelion Greens and Mascarpone Cheese | veryEATalian-2
Orzotto with Dandelion Greens and Mascarpone Cheese | veryEATalian-3
ORZOTTO WITH DANDELION GREENS AND MASCARPONE CHEESE
Orzotto al tarassaco e mascarpone

Servings: 2 | Prep time: 10 min | Cook time: 30 min

INGREDIENTS
1 lt (32 oz) vegetable broth
a small bunch of dandelion greens, roughly chopped
a drizzle of extra-virgin olive oil
1 Tbsp unsalted butter
¼ cup shallot, chopped
3/4 cup quick-cooking barley (I used Trader Joe’s 10-min barley)
(optional) ¼ cup dry white wine
¼ cup mascarpone cheese
a handful of Parmigiano Reggiano cheese, grated
salt
freshly ground black pepper

INSTRUCTIONS
1. Bring vegetable broth to a boil in a saucepan. Add dandelion greens in it and cook for 3-4 minutes. Remove them from the saucepan with a strainer and set aside. Keep broth simmering throughout the recipe.
2. In a separate heavy-bottom saucepan, heat butter and extra-virgin olive oil over medium heat. Add chopped shallot, and sauté until translucent.
3. [Take note of the time, as I’ll use this exact moment as reference (*)] Turn the heat to medium-high, add the barley and toast it for a couple of minutes, stirring frequently. Pour in the wine (or ¼ cup of broth) and cook until absorbed.
4. Turn the heat to medium-low. Add a ladle of broth and let the barley absorb the liquid, stirring occasionally. Once the liquid is absorbed, add a ladle of broth again. [Repeat this step throughout the recipe, letting the barley absorb each addition of broth.]
5. 6-7 minutes in (*), add dandelion. Stir. Keep on adding broth as it gets absorbed by the barley.
6. 16-17 minutes in (*), stop adding broth. Let the barley absorb the last bit of liquid.
7. 20-25 minutes in (*), the barley should be creamy and al dente. Remove from heat and stir in mascarpone until melted. Add parmesan cheese and, only if necessary, a bit of salt. Stir vigorously for about a minute to make orzotto ever creamier. Let rest for 2-3 minutes.
8. Sprinkle with  freshly ground black pepper. Serve hot.

Buon appetito!

Lisa
Filed Under: Friuli, Rice & Grains, Vegetarian Tagged With: barley, dandelion, mascarpone, orzotto, tarassaco, vegetarian, wild greens

Pancetta-wrapped Pork Tenderloin with Apples + Pan-roasted Apples and Potatoes

April 9, 2015 By very EATalian 2 Comments

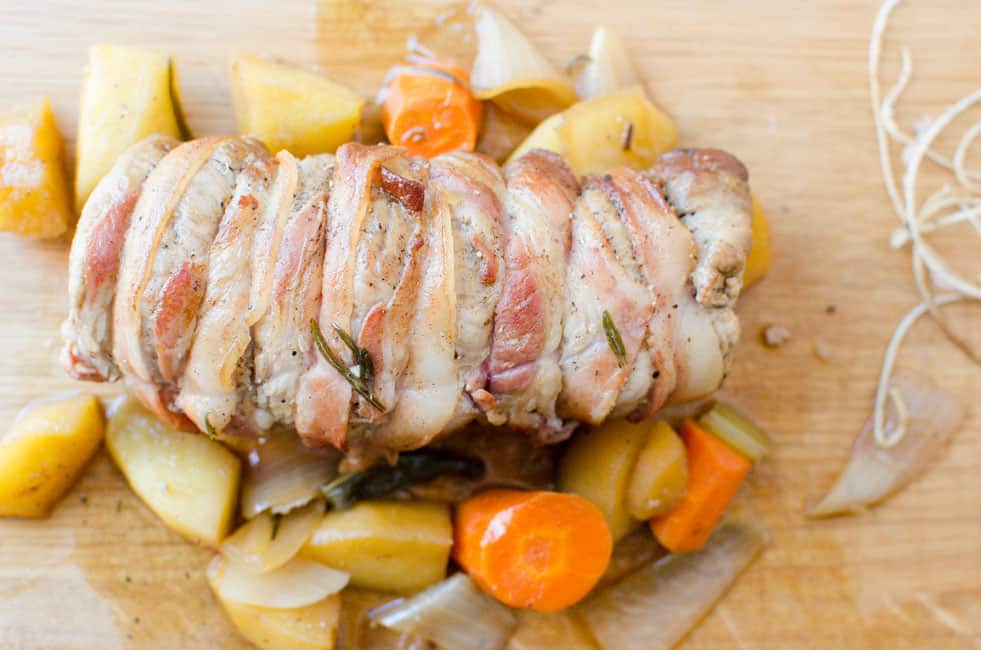
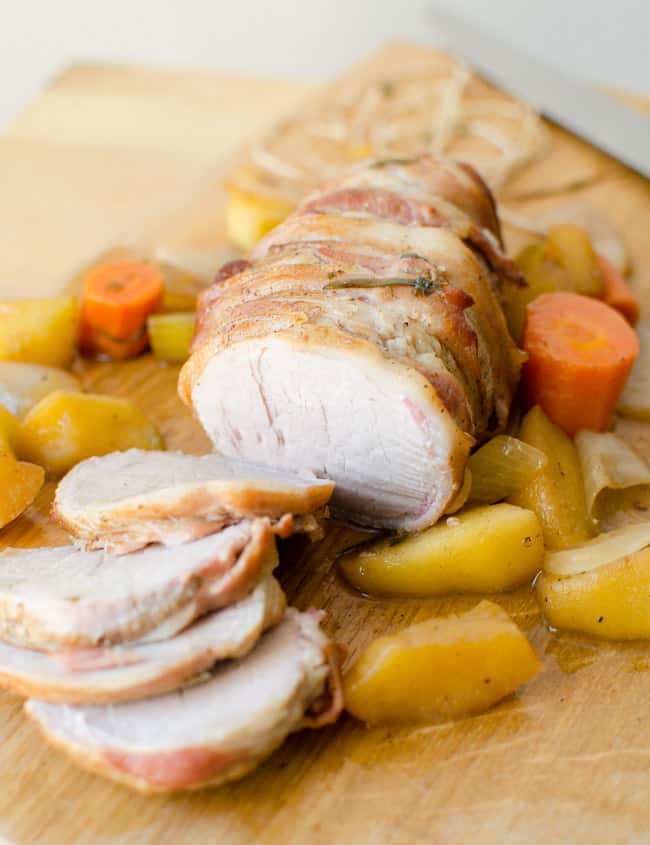
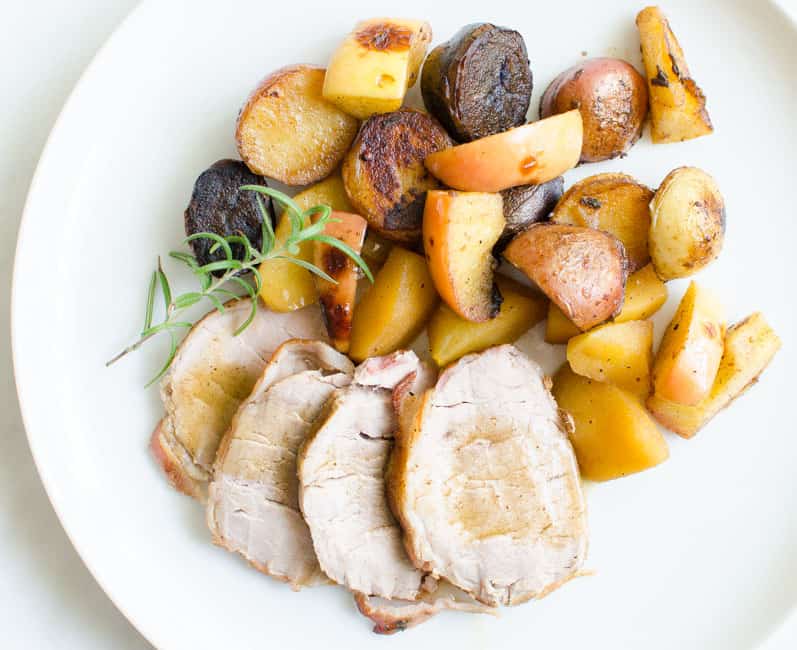
Pancetta-wrapped Pork Loin with Apples
I’m spending a few weeks in Alabama: it’s not exactly a vacation, it’s more like a temporary relocation. I knew cooking would be a challenge as I’m staying in a stove-less hotel room. I love to eat out and experience different cuisines but, after a while, it gets old and expensive. Also, my already-wavering self-control can last only for so long and, before I know it, I end up ordering delicious meals that aren’t exactly light!

While I’m longing for a full kitchen again and I’m enjoying southern food (in moderation), I’m going to share a few recipes I prepared and photographed a few days ago, from the comfort of my home.

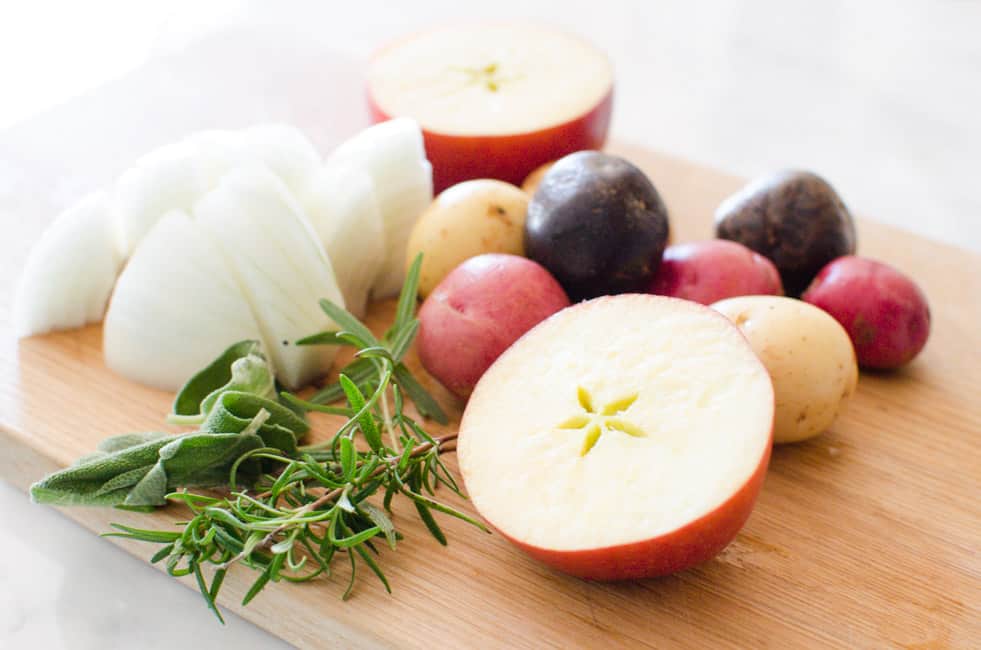
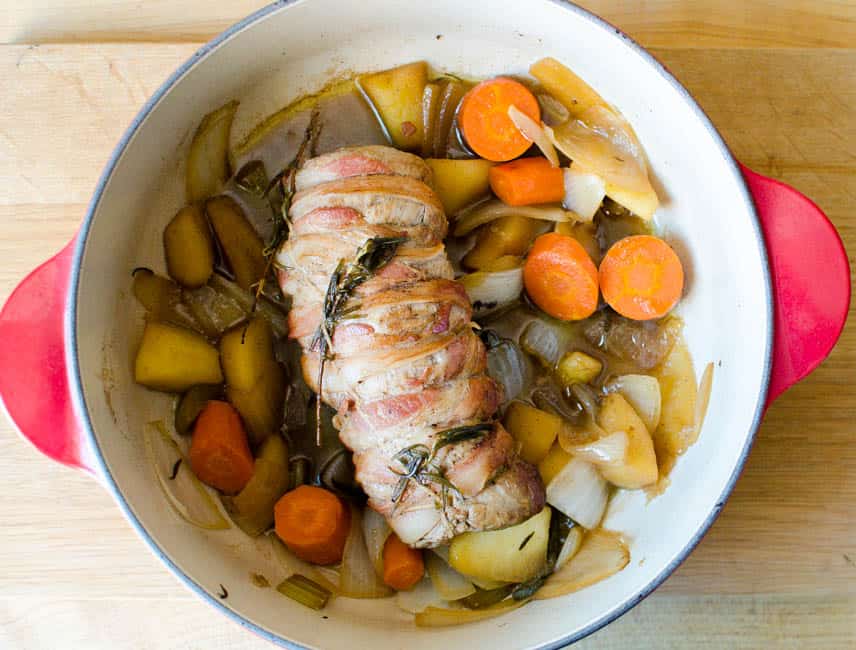
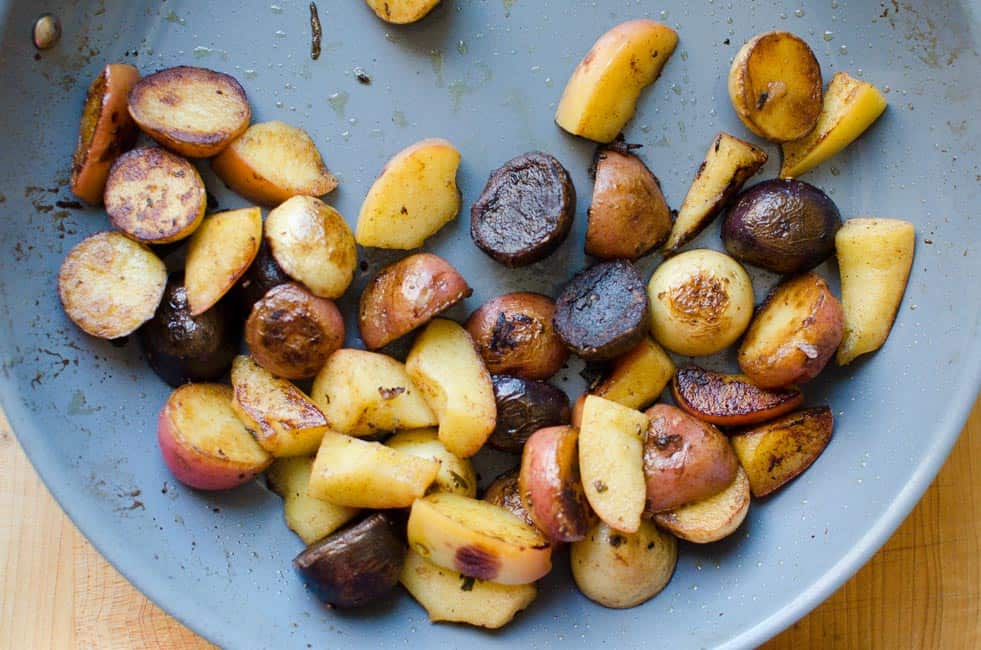
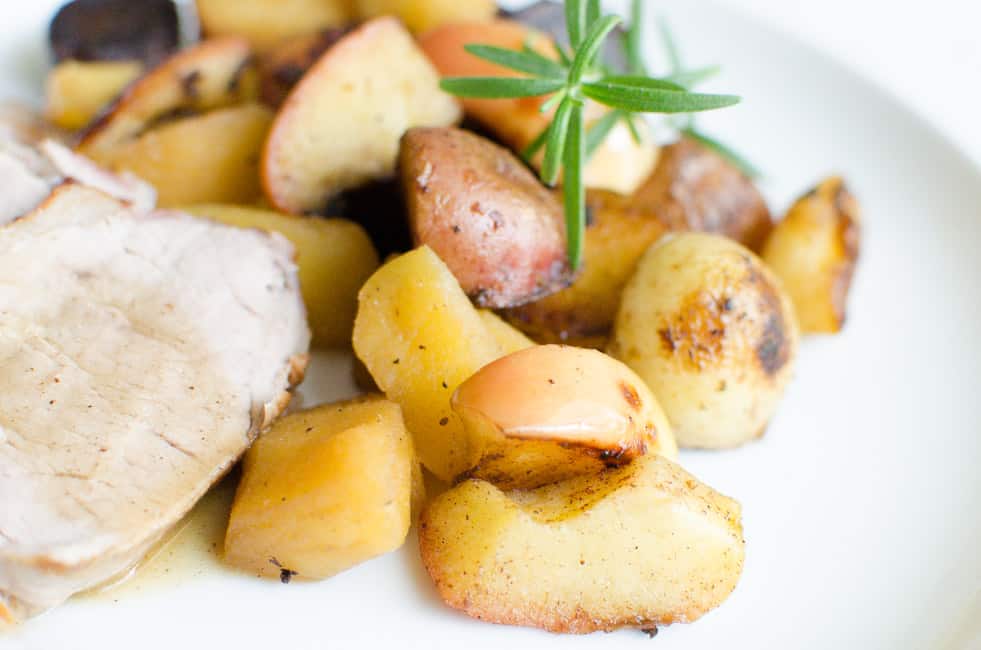
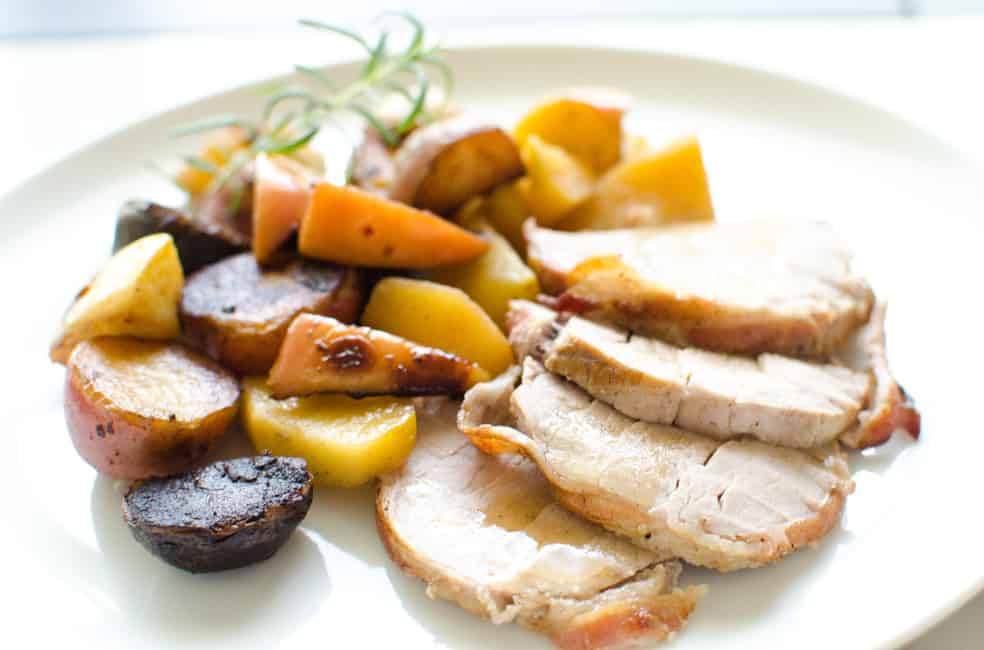
I tried this delicate pork tenderloin recipe for the first time on Thanksgiving last year. Cooking a whole turkey seemed a little bit too much for just me and my husband! While searching for an appropriate meat substitute, I stumbled upon this pork recipe on an Italian cooking blog. We tried it and we loved it so much it quickly became a staple for special occasions all year round…and even for weekend dinners! If you scroll down, you’ll also find the recipe for the pan-roasted apples and potatoes you see featured in the pictures.

Did I mention the house will smell fantastic while you’re cooking this delicious dish? I love the aroma of roasted meat: it’s comforting and inviting, and it brings back memories of my Sundays’ endless Italian lunches…Writing about nice, home-cooked food from my stove-less room is becoming really painful. Somebody lend me a real kitchen, please!

Pancetta-wrapped Pork Loin with Apples
Pancetta-wrapped Pork Loin with Apples and Potatoes | veryEATalian-19
Pancetta-wrapped Pork Loin with Apples and Potatoes | veryEATalian-20
Pancetta-wrapped Pork Loin with Apples and Potatoes | veryEATalian-5
Pancetta-wrapped Pork Loin with Apples and Potatoes | veryEATalian-9
Pancetta-wrapped Pork Loin with Apples and Potatoes | veryEATalian-14
Pancetta-wrapped Pork Loin with Apples and Potatoes | veryEATalian-17

PANCETTA-WRAPPED PORK TENDERLOIN WITH APPLES
Source: adapted from Siciliani Creativi in Cucina
Servings: 2-3 |Prep Time: 20 min | Cook Time: 40 min | Rest time: 5 min | Total time: 1 h 5 min

INGREDIENTS
450 g (1 lb) pork tenderloin
kosher salt
freshly ground black pepper
3 thick slices of pancetta
2 small sprigs of rosemary
1 1/2 Tbsp butter
a drizzle of extra-virgin olive oil
3/4 cup dry white wine
1 onion, cut in big sections
1 carrot, cut in chunks
1/2 celery stalk, cut in chunks
1 or 2 apples, peeled and sliced in wedges, then halved
2 leaves of sage

INSTRUCTIONS
1. Cut excess fat from pork tenderloin. Rub meat with salt and pepper and arrange pancetta around it. Tie it with cooking twine (here‘s a good tutorial). Insert a couple of rosemary sprigs between the meat and the twine.
2. Heat 1 1/2 tablespoons of butter and a splash of extra-virgin olive oil in a cast-iron dutch oven. Place pork tenderloin in the casserole, turn heat to medium-high and sear the meat on all sides until you obtain a golden brown crust all around. [Do not poke the meat with a fork or it will release its juice. Use two spoons to roll it on each side.] This step may take about 10-12 minutes.
3. Pour in wine and add celery, onion, carrots, and sage. Cook meat and vegetables over medium-high heat, until liquid is reduced to one-third.
4. Add apple pieces, turn heat to low and cover. Cook for 20-25 min.
5. Remove pot from heat and transfer tenderloin to cutting board. Tent with aluminum foil and let rest for about 5 min.
6. Remove all veggies and apples from dutch oven. Transfer cooked apple chunks to serving platter and discard other veggies. Place dutch oven containing cooking juices back on the stove and turn heat to medium-high. Deglaze with wine or water and cook until you obtain a shiny and dense gravy. Remove dutch oven from heat and filter gravy.
7. Remove twine from the tenderloin (keeping the pancetta in place). Slice the meat and place it on a serving platter, arranging cooked apple pieces around it. Pour a bit of the gravy on top of the meat.

….While the meat is cooking….

PAN-ROASTED POTATOES AND APPLES
Servings: 2-3 | Prep time: 5 min | Cook Time: 20 min | Total time: 25 mi

INGREDIENTS
400 g (14 oz) baby potatoes, washed and halved, skin-on
1 1/2 Tbsp butter
a couple of leaves of sage
1 apple, sliced in wedges, skin-on
salt & pepper to taste
a pinch of cinnamon

INSTRUCTIONS
1. Half-cook small potatoes halves by boiling them for about 8 minutes. Drain potatoes and set aside.
2. Heat butter on a skillet over medium-heat. Add potatoes and sage. Stir often.
3. Cut apple wedges in half. Once potatoes have reached a light brown color (but aren’t cooked through yet), add in apple pieces. Keep stirring to prevent burning. Add a pinch of cinnamon and a bit of water, if necessary, to avoid burning.
4. Once cooked through, add salt and pepper to taste. Serve with sliced pork tenderloin.

Buon appetito!

-Lisa

Filed Under: Holidays, Meat Tagged With: apples, herbs, meat, pancetta, pork, potatoes, tenderloin

Mini Jam Tarts

March 31, 2015 By very EATalian Leave a Comment

Mini Jam Tarts | veryEATalian-10
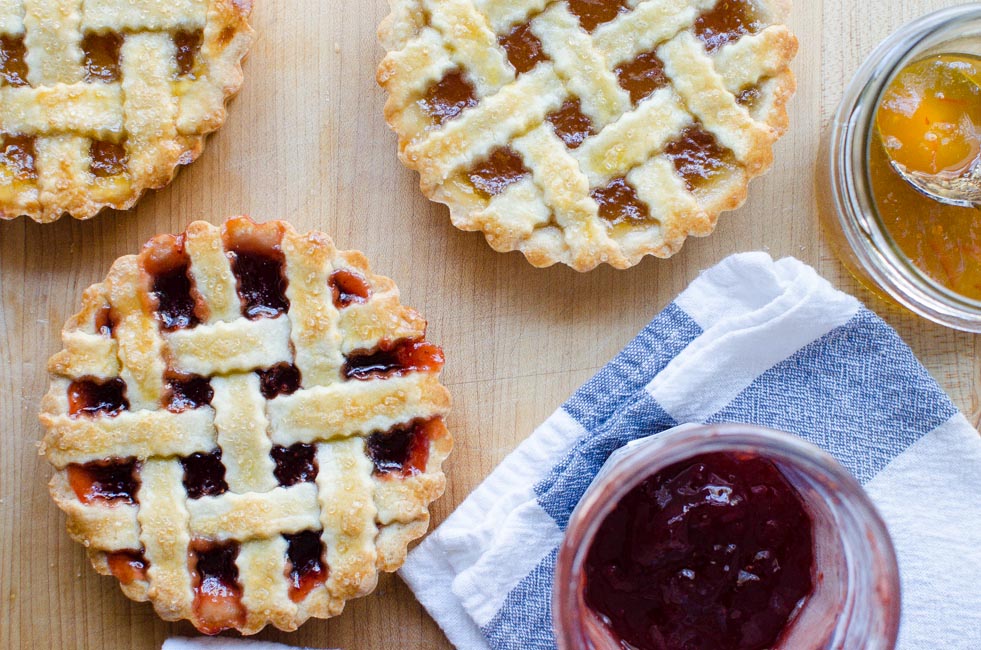
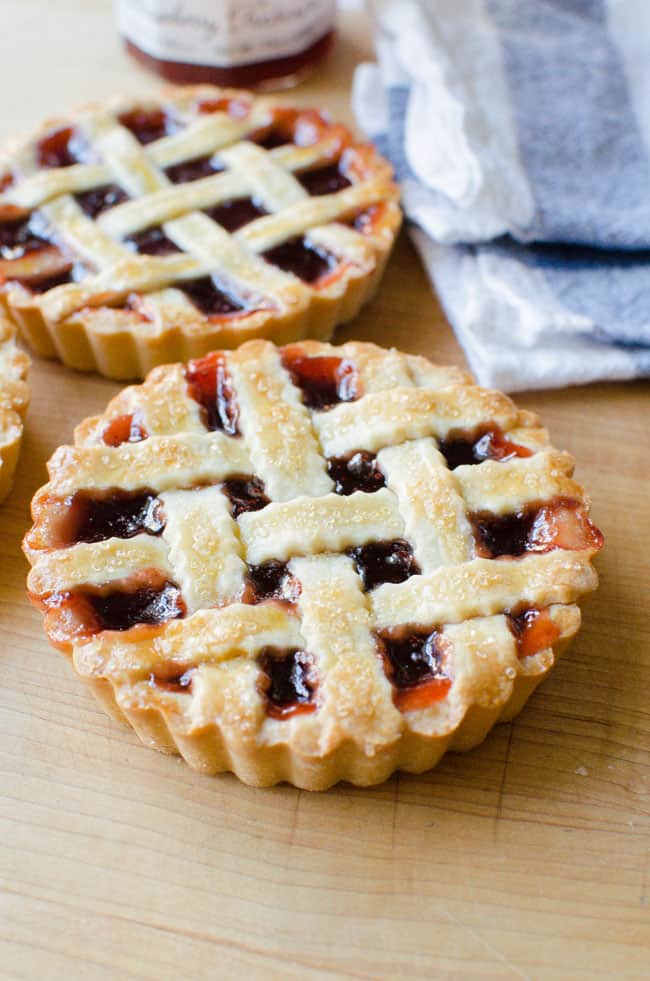
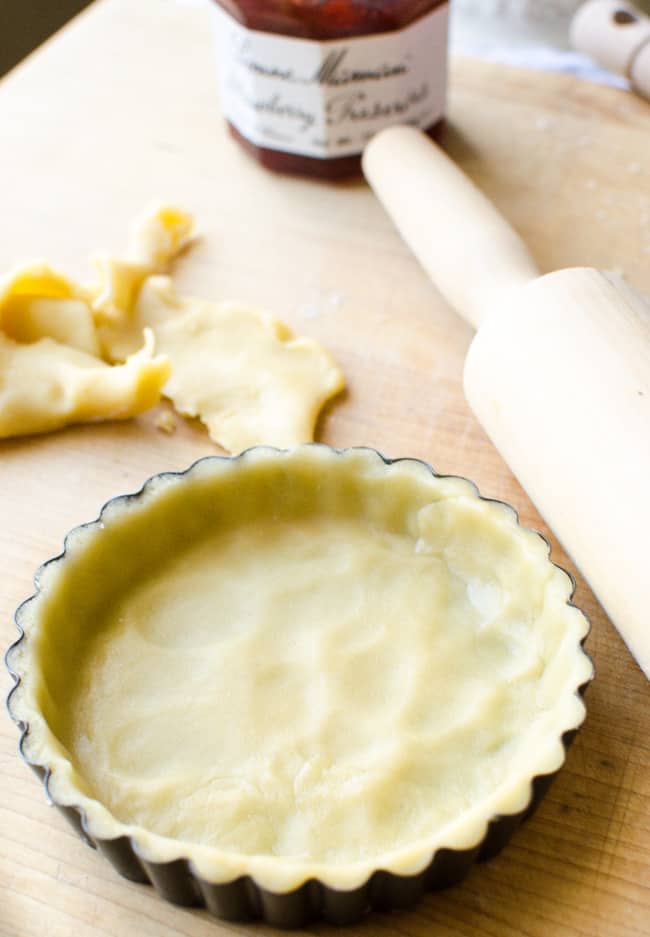
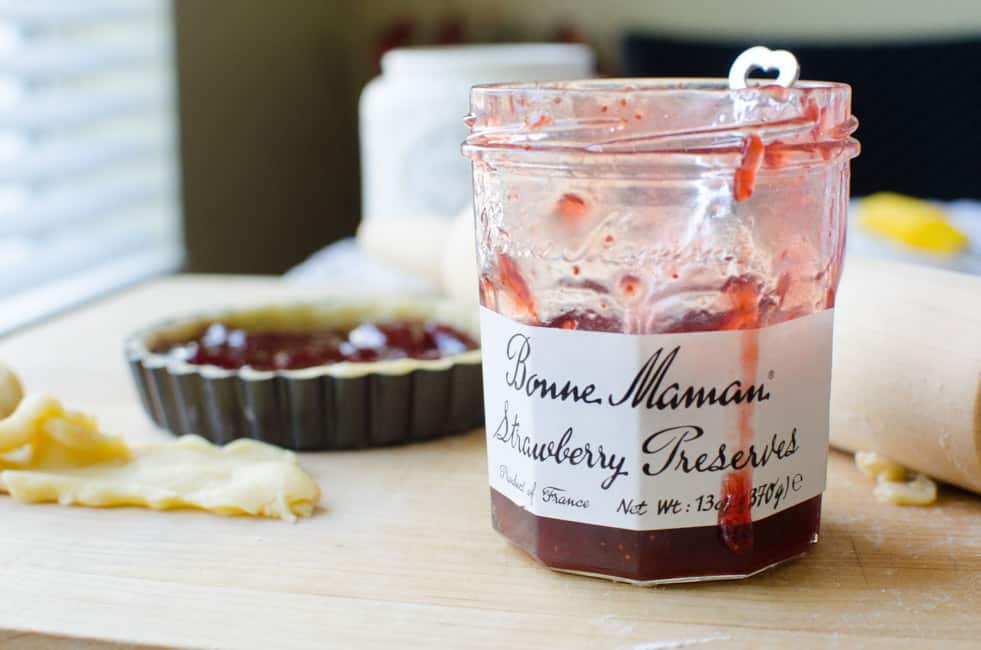
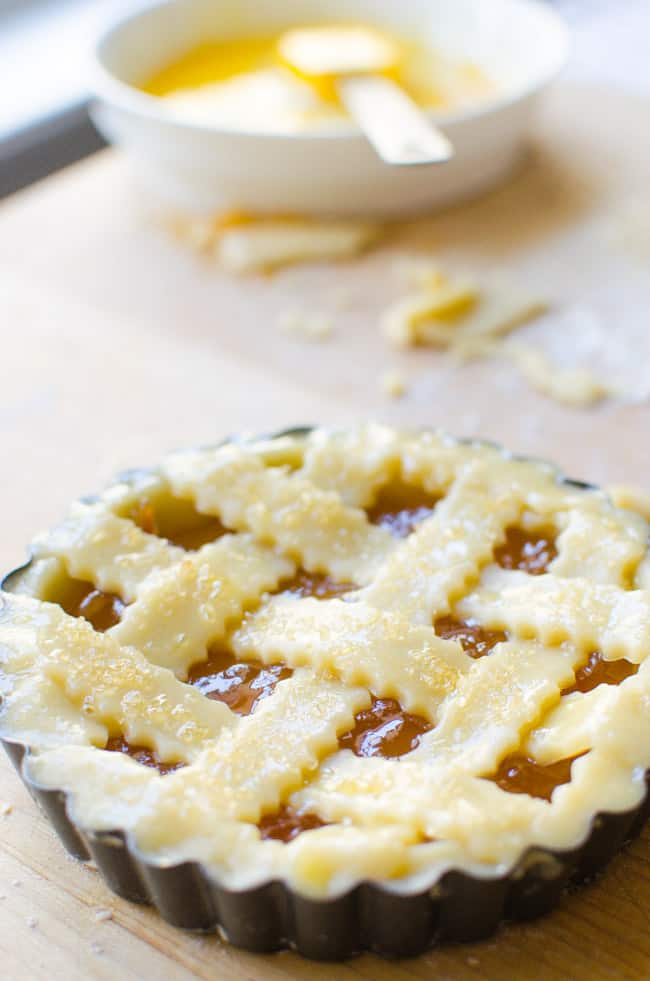
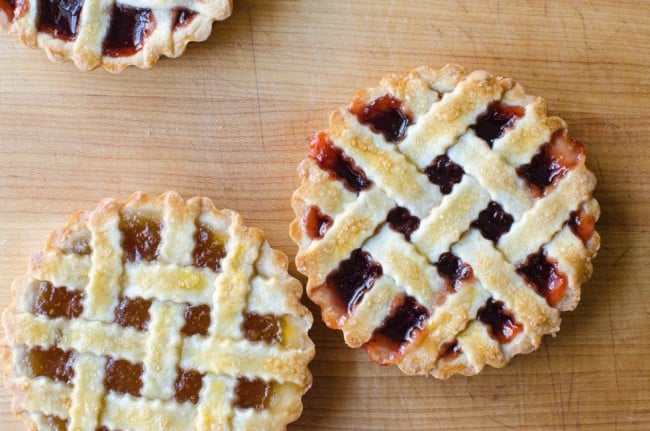
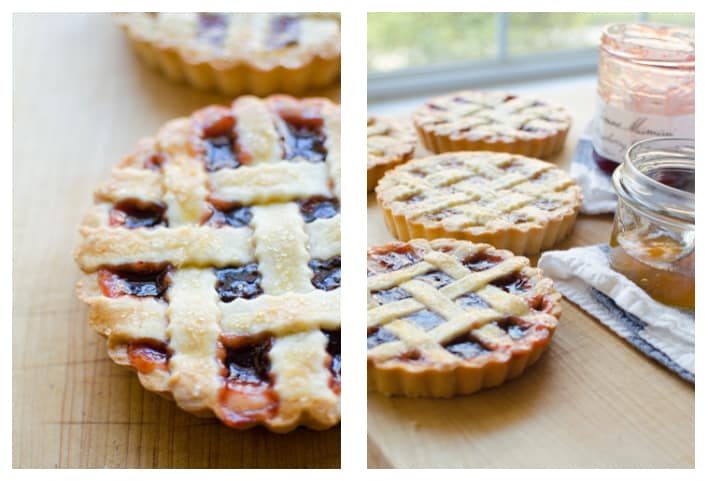
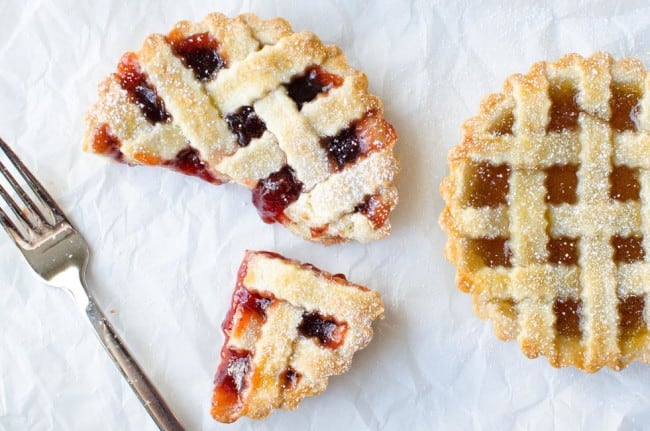
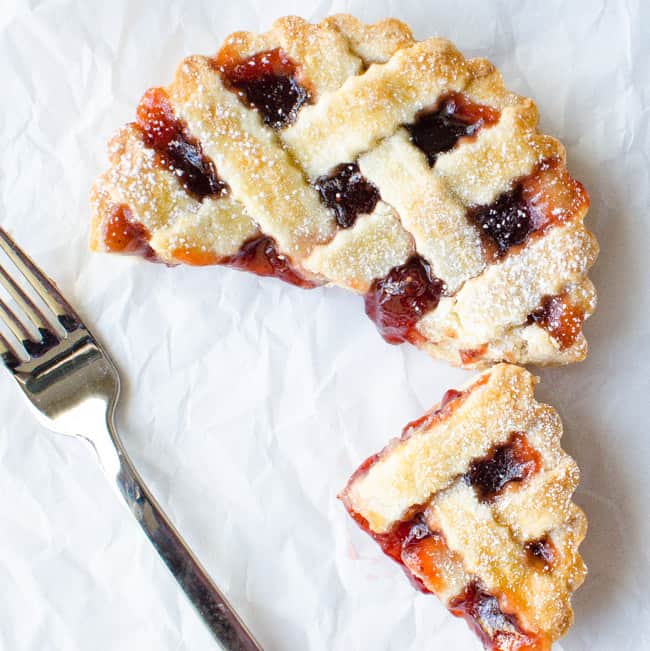
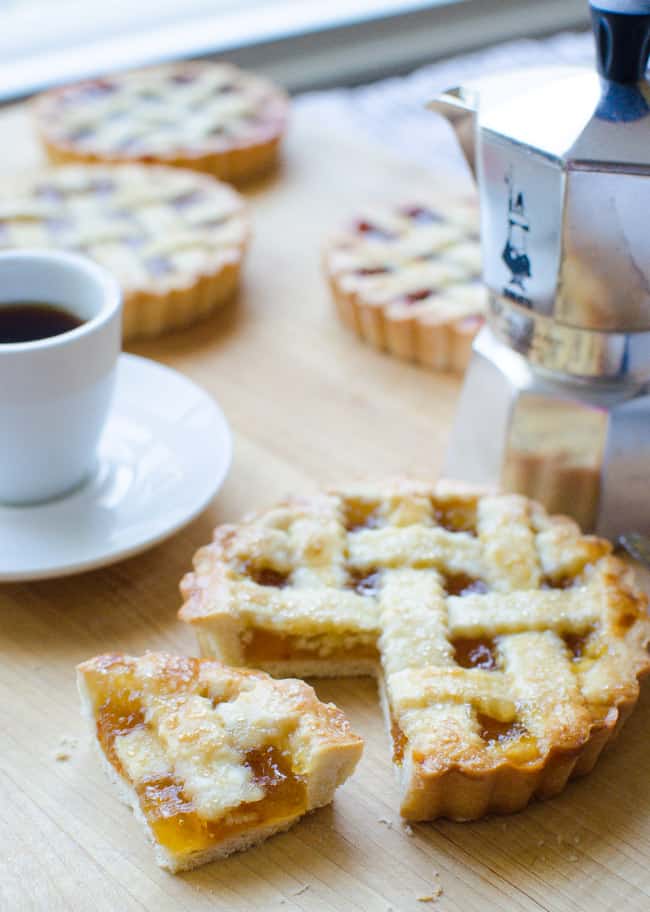
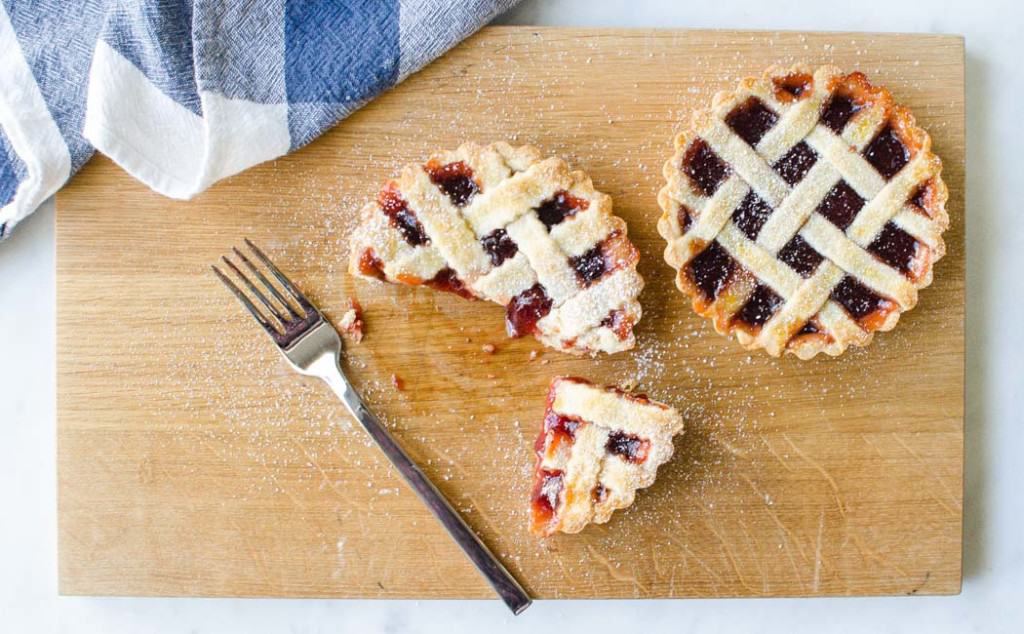
Mini Jam Tarts | veryEATalian-22These little tarts (crostatine in Italian) were one of my favorite afternoon snacks when I was a kid. Back then, my grandmother used to buy them from the grocery store and kept them in her pantry, right next to the paper napkins. When it was ora della merenda (“snack time”- around 4pm), I’d run next door and sneakingly grab one of them. I even remember further digging in the box to look for a little match box that contained a little surprise toy (Sorpresine del Mulino Bianco may sound familiar to whomever was a child in the 80s in Italy!). I spent so many afternoons playing with my brother and my cousins with a crostatina in one hand and one of those little toys in the other. Who needed videogames back then? Sure, we watched cartoons but we certainly spent a lot of time outside playing with simple things like those little toys…and we were happy kids!

When I recreated this childhood snack, I couldn’t help but smile while reminiscing about those times. These tarts are only made of short pastry dough and jam. Quite simple, isn’t it? Their small size and the beautiful lattice top make them look so adorable! I couldn’t stop taking photos of them and – ahem – you can tell I went a little overboard this time…

Mini Jam Tarts | veryEATalian-12
Mini Jam Tarts | veryEATalian-11
Mini Jam Tarts | veryEATalian-14
Mini Jam Tarts | veryEATalian-16
Mini Jam Tarts | veryEATalian-28
How to Make a Lattice Pie Crust | veryEATalian
Mini Jam Tarts | veryEATalian-29
Mini Jam Tarts | veryEATalian-20
Foto coppia 1
Mini Jam Tarts | veryEATalian-3
Mini Jam Tarts | veryEATalian
Mini Jam Tarts | veryEATalian-6
Mini Jam Tarts | veryEATalian-9
Mini Jam Tarts | veryEATalian-26

MINI JAM TARTS – CROSTATINE ALLA MARMELLATA
Servings: Makes five 4.75″ tarts (8-10 people) | Prep time:  15 min (dough) + 25 min (tarts assembling) | Rest time:  30 min  | Bake time: 30 min

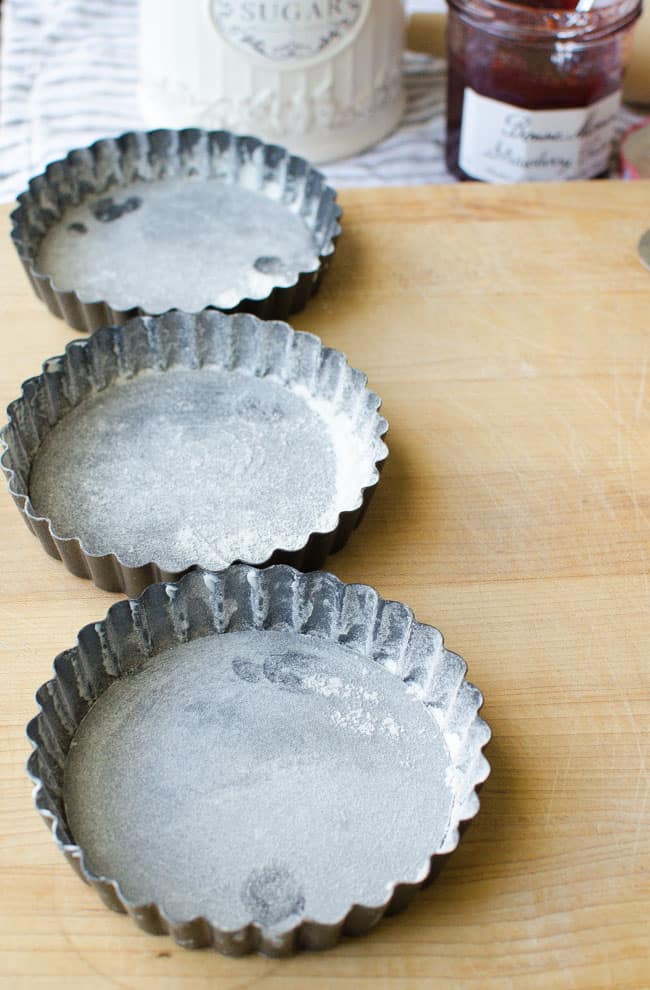
Recommended equipment: 4.75″ tart pans, rolling pin

INGREDIENTS
Short Pastry Dough
150 g (10 Tbsp + 2 tsp) unsalted butter
125 g (1/2 cup + 2 Tbsp) granulated sugar
1 large egg
250 g (2 cups) all-purpose flour
a dash of vanilla
a pinch of salt
vegetable oil for plastic wrap
a bit of sugar to sprinkle on top

Filling
13 oz jam (1 jar)

Egg wash
1 egg
1 Tbsp water or milk

INSTRUCTIONS
1. Cream butter with sugar using a stand mixer. Add salt, egg, and vanilla extract.
2. Sift flour and add it into the mixture. Once flour is incorporated, remove dough from mixing bowl and knead briefly until you obtain a smooth dough.
3. Wrap it in lightly oiled plastic wrap and refrigerate for 30 minutes.
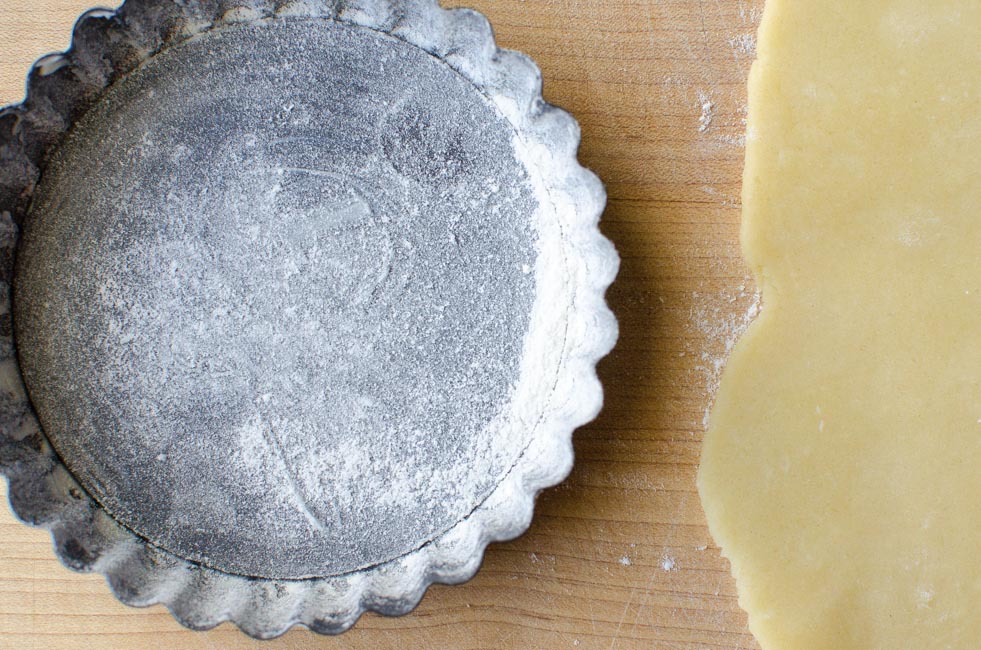
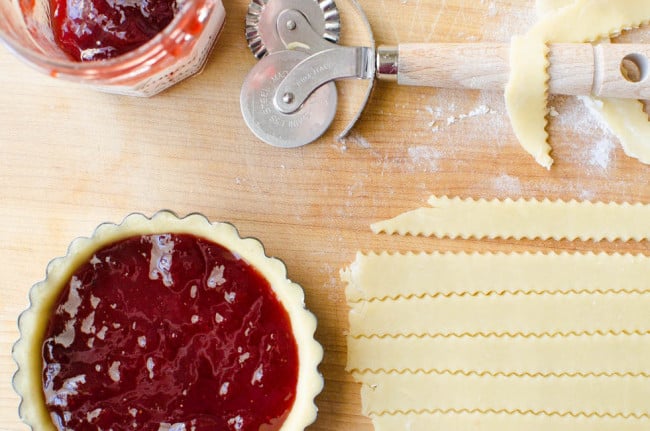
4. Once the dough has rested, place it on a lightly floured surface and roll it out to a bit less than 1/8 inch (3mm). Add flour if too sticky. Cut dough in circles to fit into each tart pan, trimming the dough to cover the bottom and sides of the pan. Reserve excess dough for lattice top.
5. Heat oven to 350F.
6. Pour jam into dough-lined tart pans until half full.
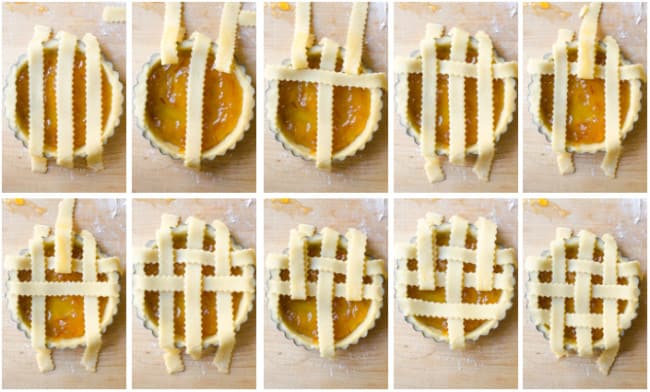
7. Roll out remaining dough and cut into strips. Form a lattice top by following photo tutorial above. Trim even with the crust edge and pinch to seal.
8. Make egg wash by mixing 1 egg and 1 tablespoon of milk or water. Brush strips and crust edge with egg wash. Sprinkle a little sugar on top of egg-washed crust.
9. Bake for 30 minutes, or until crust is golden brown.

Buon appetito!

-Lisa

Filed Under: Breakfast, Desserts & Sweets Tagged With: crostata, dessert, jam, short pastry, snack, tart

Gelato Affogato al Caffè

March 27, 2015 By very EATalian Leave a Comment

Affogato al caffe' | veryEATalian 25

There are days when I’m lazybones in the kitchen and I just want to dump things in a bowl and eat out of it. If I can avoid using utensils or cutting boards that don’t fit in the dishwasher, that’s a bonus. Salads are a great example of brainless dishes but, when it comes to desserts, I don’t think you can get any easier than making an Affogato al Caffè. It’s such an easy dessert it doesn’t even require instructions.

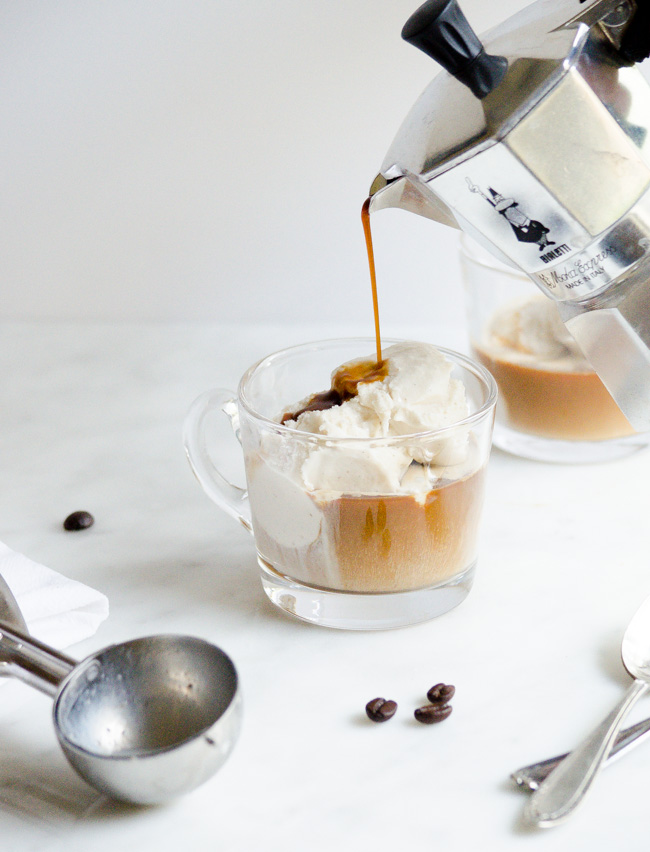
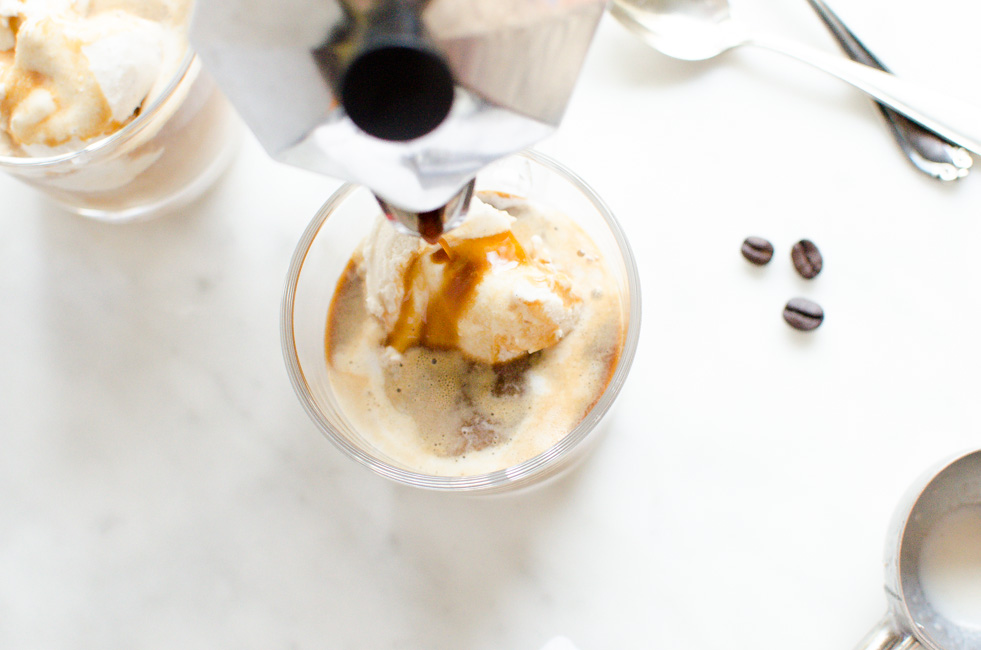
Affogato literally means “drowned” and caffè means “coffee” (duh!). It’s basically a scoop of gelato on which you pour coffee (“drowned by coffee”–what a sweet death!). Is it delicious? OH. EM. GEE. I mean, we’re talking about putting together two of the most wonderful things we’re blessed to have in this world! Isn’t that enough? Well, you can make it even more to-die-for by adding a few chocolate chips or pouring a bit of chocolate liqueur in it. Honestly, sky’s the limit and you can personalize it by adding whatever toppings you prefer. However, please don’t be tempted by replacing gelto with ice cream or espresso with regular coffee. It may somehow work, but it’s not the same thing.

This dessert is a neat idea for a dinner with friends: it’s cool to assemble it in front of them or even let them pass around the coffee to pour in their own gelato cups. It’s a fun, elegant, and effortless dessert. You can’t ask for more.

And now, let’s drown in coffee!

Affogato al caffe' | veryEATalian-26
Affogato al caffe' | veryEATalian-29
Affogato al caffe' | veryEATalian-28
Affogato al caffe' | veryEATalian-27

AFFOGATO AL CAFFE’
Servings: 2 | Time: 5-10 minutes, tops!

INGREDIENTS
2 shots (4-6 oz total) of coffee (brewed with moka or espresso machine)
2 big scoops (or 4 small scoops) of gelato (vanilla, coffee or chocolate all work great)

INSTRUCTIONS
1. Place one or two scoops of gelato in each cup.
2. Pour a small amount of coffee (1 espresso shot) over gelato and add any other toppings, if using. Serve immediately (it melts quickly)!

Yep. I told ya. It’s that easy. However, here are a few notes and suggestions:
-Fancy additions ideas: coffee or chocolate liqueur, rum, chocolate chips, chocolate syrup, whipped cream.
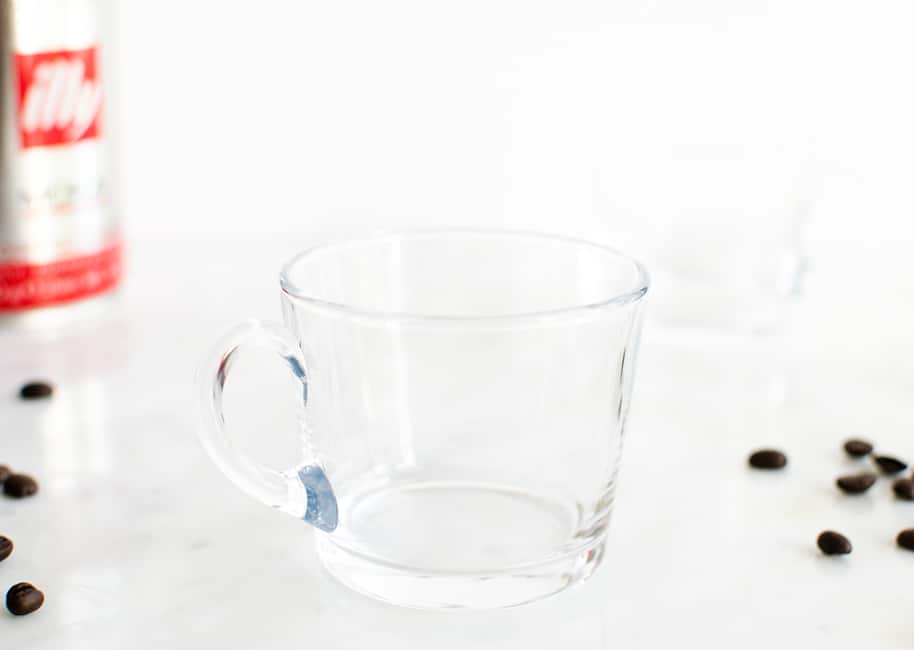
-I prefer using transparent cups as they better show the contrasting colors of the two ingredients.
-The traditional way to serve this dessert is by pouring hot coffee, which makes the gelato melt quickly (think of a float). This is why you should serve it and eat it immediately. However, if you like to keep the consistency of the gelato a bit longer, you can use cold coffee.

*Special thanks to my hubby for providing a steady pour for these photos!

Follow my blog with Bloglovin

Filed Under: Desserts & Sweets Tagged With: coffee, espresso, gelato, ice cream, vanilla

Tagliolini with Prosciutto di San Daniele

March 22, 2015 By very EATalian Leave a Comment

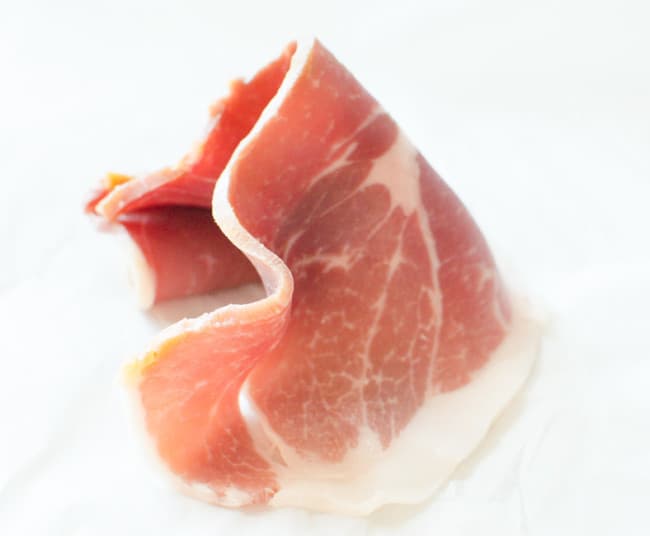
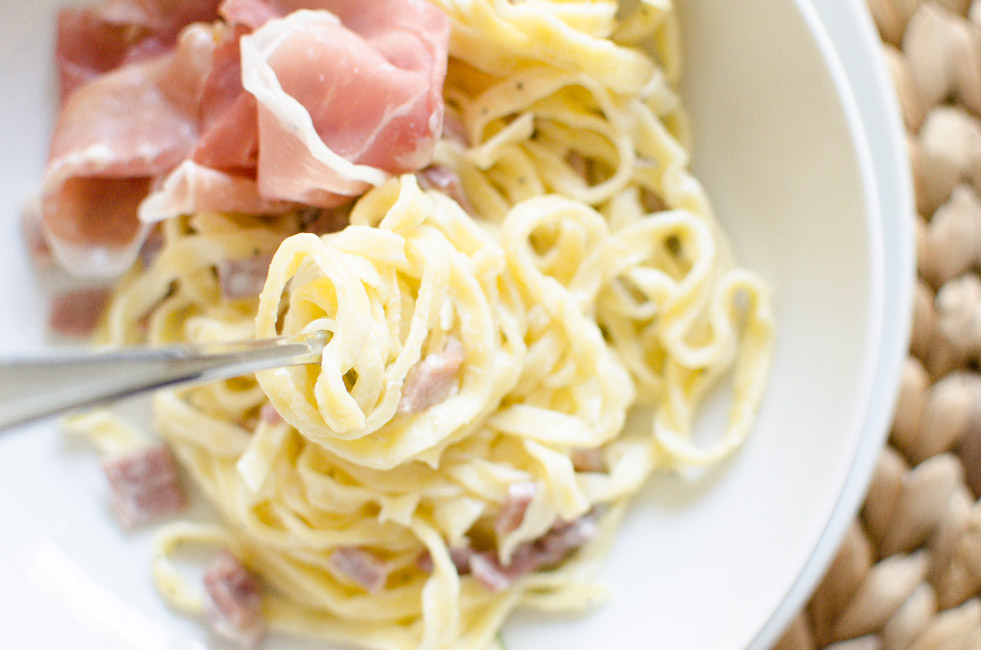
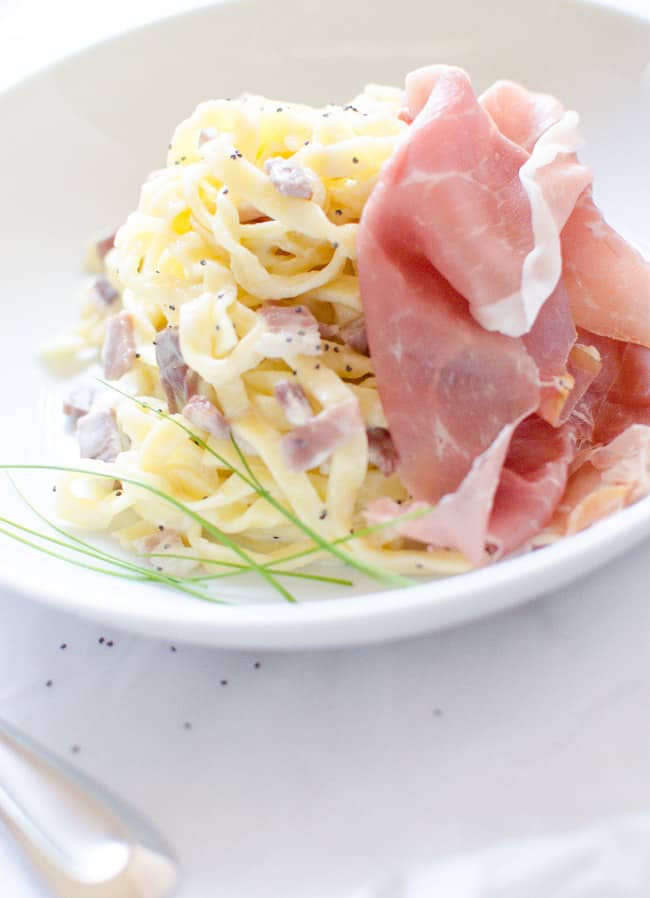
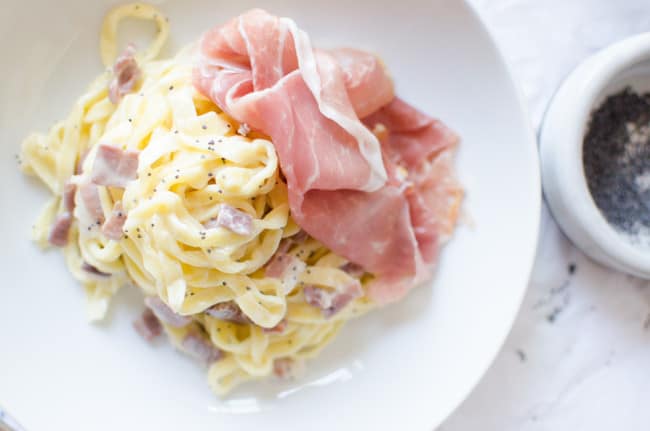
Tagliolini with Prosciutto di San Daniele | veryEATalian-14 One way to make my husband really, REALLY happy is to prepare this pasta dish for him. He adores prosciutto di San Daniele and I’m pretty sure my family’s love and massive consumption of this amazing cured meat rubbed off on him. Since I can remember, we’ve always kept a whole prosciutto in our basement fridge and, when needed, we simply pulled it out and sliced it up. The standard way  to receive guests has always been to serve a huge platter of freshly sliced prosciutto, with some bread sticks and a glass of Prosecco or Friulano wine. What’s called prosciutto here is actually called “prosciutto crudo” in Italy. It’s a genuine, high-quality and dry-cured meat, simply made of Italian pork and sea salt. Unlike many other cold cuts, you won’t find any other ingredients such as nitrates, water or sugar on the prosciutto label. This wonderful pasta recipe calls for Prosciutto di San Daniele. Although Parma ham is probably more available here in the States, I highly encourage you to go out of your way and find San Daniele instead. There’s also no other prosciutto that combines salty and sweet in the amazing way that San Daniele does. It just melts in your mouth. Make sure you ask for paper-thin, but not shredded slices! Maybe if you’re lucky, the person working the slicer will offer you a free sample as they get the thickness right. It happened to us at Whole Foods and I clumsily dropped half of the slice as my husband handed it to me. I nearly cried.
Tagliolini with Prosciutto di San Daniele | veryEATalian-4
Tagliolini with Prosciutto di San Daniele | veryEATalian-5
Tagliolini with Prosciutto di San Daniele | veryEATalian-2
Tagliolini with Prosciutto di San Daniele | veryEATalian-6
Tagliolini with Prosciutto di San Daniele | veryEATalian-17
Tagliolini with Prosciutto di San Daniele | veryEATalian-16
Tagliolini with Prosciutto di San Daniele | veryEATalian-12
TAGLIOLINI WITH PROSCIUTTO SAN DANIELE
Servings: 2 generous portions | Prep time: 10 min | Cook time: 4-5 min

INGREDIENTS
200 g (7 oz) tagliolini (or taglierini) egg pasta
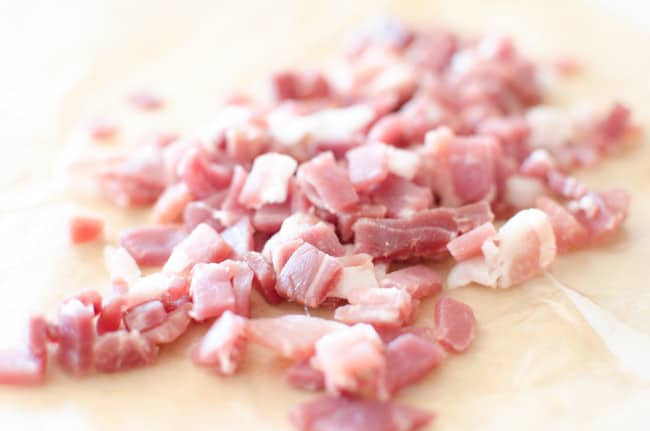
one 1/8 inch-thick slice (about 100 g–a little less than 1/4 lb) of Prosciutto di San Daniele, coarsely minced
2 paper-thin slices Prosciutto di San Daniele to lay on top
20 g (1 1/2 Tbsp) butter
100 ml (1 scant half cup) heavy cream poppy seeds (optional)
chives to garnish

INSTRUCTIONS
1. Bring a pot of salted water to a boil.
2. Heat butter in a pan, add minced prosciutto and let it saute for 1-2 minutes, until it changes color. Add heavy cream, stir and remove from heat.
3. Add tagliolini in boiling water and cook until al dente, for 3-4 minutes. [If the pasta is homemade, cooking time may vary based on how thin you rolled it; if the pasta is store-bought, follow the cooking instructions on the package. The best way is to always test-taste it before draining it.]
4. Drain the tagliolini and pour them in the pan with the sauce. Stir and let it saute for few more minutes, until sauce is partially absorbed.
5. Serve tagliolini on a plate and sprinkle some poppy seeds on top. Arrange a thin slice of prosciutto on top and garnish with chives.

Buon appetito!

-Lisa

Filed Under: Pasta & Gnocchi Tagged With: egg pasta, heavy cream, pasta, prosciutto, tagliolini

Pizza Margherita with Cherry Tomatoes

March 18, 2015 By very EATalian Leave a Comment

I’m a firm believer there’s only one pizza deserving of the name: a light, thin-crust pizza topped with just enough quality ingredients. No fancy deep dish pie, with cheese-filled crust or multi-layered toppings can compare to the wonderful, simple, and tasty delight of a traditional Italian pizza.

Pizza Margherita with Cherry Tomatoes | veryEATalian-2Now that you know how particular I am about this Italian “sacred food”, you’ll also be able to understand how frustrating it was for me to find a legitimate pizza once I left Italy. When my husband and I arrived here, we initially tried a couple of  restaurants claiming to serve the real Italian-style pizza. After tasting entirely burnt crusts and too-plastic-to-be-real-mozzarella, I decided it was just time to improve my own home-made pizza recipe.

Believe it or not, even for the average Italian home cook it’s quite hard to achieve a crust similar to the one you’d taste at a pizzeria–one with a great wood oven to give the crust incredible flavor and texture. Unfortunately, I’m a regular person with a regular kitchen…and no plans for installing a commercial pizza oven. However, after a bit of research and a couple of adjustments, I think I’ve managed to achieve a pretty legit home-style pizza.

There are a few tricks you need to know and I included them in the recipe below. I didn’t bother adding a bunch of toppings; for good pizza you just need a couple of high-quality ingredients. The key is keeping it simple!

Pizza Margherita with Cherry Tomatoes | veryEATalian-5
Pizza Margherita with Cherry Tomatoes | veryEATalian-6
Pizza Margherita with Cherry Tomatoes | veryEATalian-7
Pizza Margherita with Cherry Tomatoes | veryEATalian
Pizza Margherita with Cherry Tomatoes | veryEATalian-11
Pizza Margherita with Cherry Tomatoes | veryEATalian-8
Pizza Margherita with Cherry Tomatoes | veryEATalian-9
Pizza Margherita with Cherry Tomatoes | veryEATalian-3
Pizza Margherita with Cherry Tomatoes | veryEATalian-10
Pizza Margherita with Cherry Tomatoes | veryEATalian-13
Pizza Margherita with Cherry Tomatoes | veryEATalian-4
PIZZA MARGHERITA WITH CHERRY TOMATOES
Servings: 2 | Prep time: 20 min | Rest time: 2 hours | Bake time: 16 min

NOTE: In this recipe I used two different types of flour. You can use just one, as long as you keep the  same ratio of flour/water (250 g/150 ml). Once again, I recommend using a digital scale to achieve best results!

Recommended equipment: 15″ pizza stone

INGREDIENTS
200 g (7 oz) finely milled Italian flour (Tipo “00”) or all-purpose flour
50 g (1.8 oz) whole wheat flour
150 ml (5 oz) lukewarm water
3.5 gr (1/2 packet) active dry yeast
1 tsp sugar
1/2 tsp salt + 1/2 tsp salt for the sauce
200 ml (6.7 oz) unsalted strained tomatoes — the best quality you can find
a sprinkle of dry oregano
200 g (7 oz) mozzarella cheese (ovoline or bocconcini), drained and shredded — the best quality you can find
10 cherry tomatoes, halved
10-12 basil leaves

INSTRUCTIONS
1. Dissolve yeast and sugar in a glass of lukewarm water. Sift the flour in a medium-sized bowl and add the yeast/water/sugar mixture in it. Work the dough with your hands and knead until all ingredients are well incorporated. Add salt.
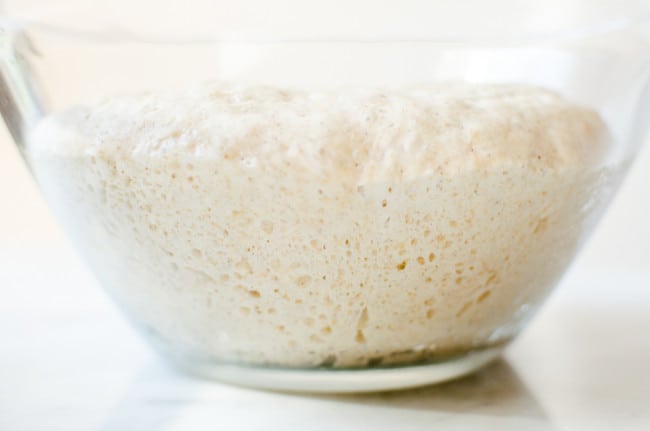
2. Take the dough onto a clean work surface and start kneading until it reaches a soft, elastic, and smooth texture.  Take the dough and bang it on the work surface, about 6-7 times. Form the dough into a ball and place it in a bowl, covered with a clean dishtowel. Let it rest for 2 hours in a dry place.
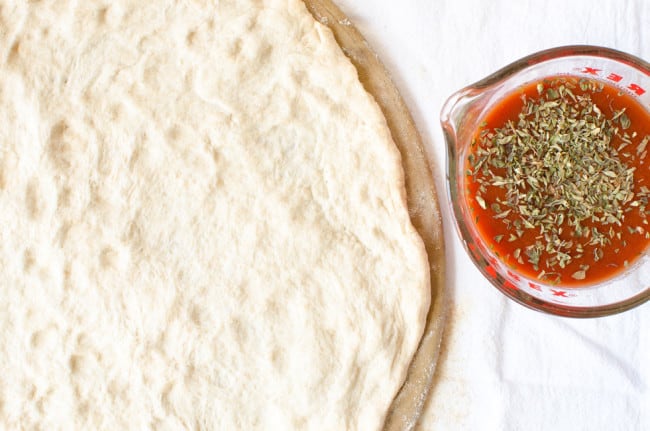
3. While the dough is resting, prepare the tomato sauce by combining the strained tomatoes with 1/2 tsp of salt, 1 tsp of sugar and a sprinkle of oregano.
4. After the dough has rested, turn oven to 450°F. Dust the pizza stone generously with flour. Take the dough, form a small disk with your hands and start pulling out the sides, stretching it until it covers the whole pizza stone [don’t overwork it!]
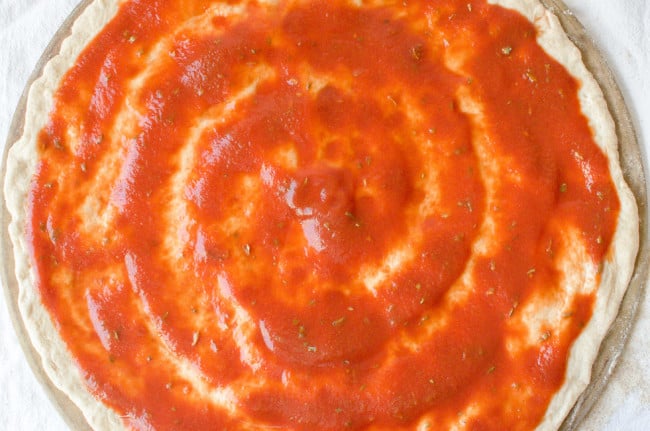
5. Spread the tomato sauce on the pizza dough with a spoon, leaving an edge for the crust. Bake for about 8 minutes.
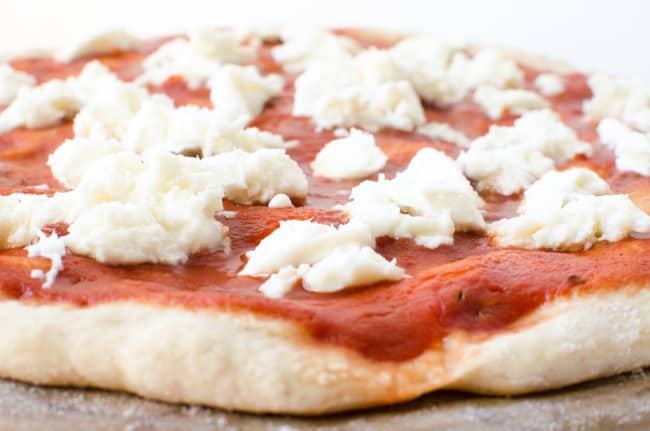
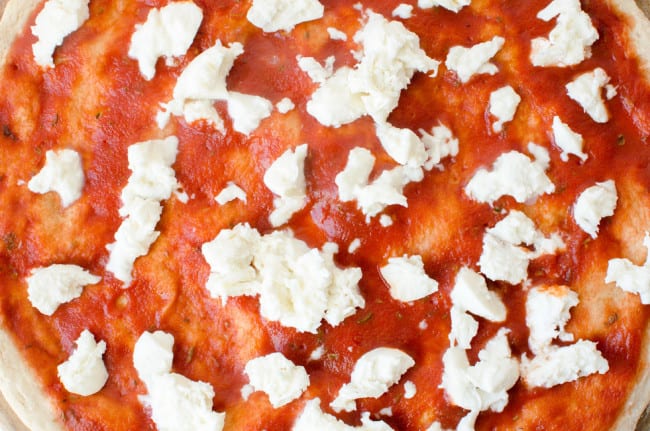
6. Remove pizza from the oven, sprinkle the shredded mozzarella on top and bake pizza for 6 more minutes.
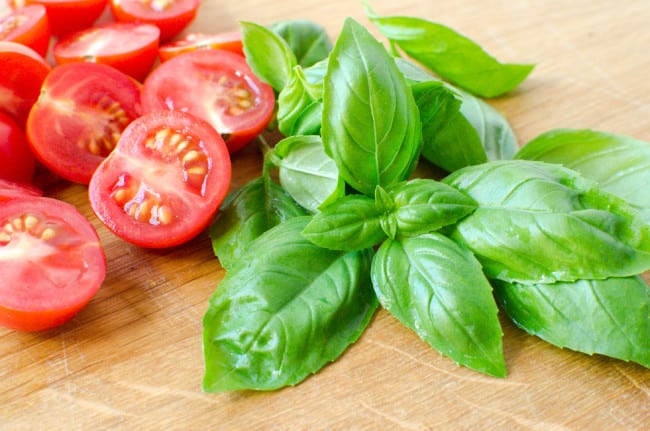
7. Remove from the oven and add cherry tomato halves, cut side-up. Bake for 2 more minutes, until the mozzarella is lightly brown-colored and the crust is golden.
8. Remove pizza from the oven. Add fresh basil leaves on top and let it sit for about 5 minutes before serving.

Buon appetito!

-Lisa

Filed Under: Pizza & Bread, Vegetarian Tagged With: basil, cherry tomatoes, mozzarella, pizza

Fresh Egg Pasta

March 12, 2015 By very EATalian Leave a Comment

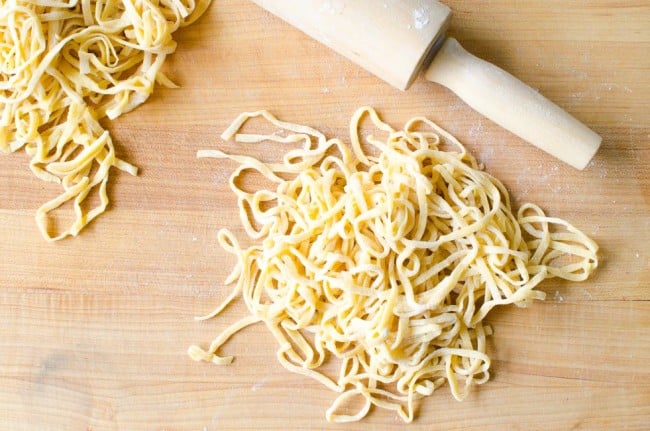
Fresh Egg Pasta | veryEATalian-2
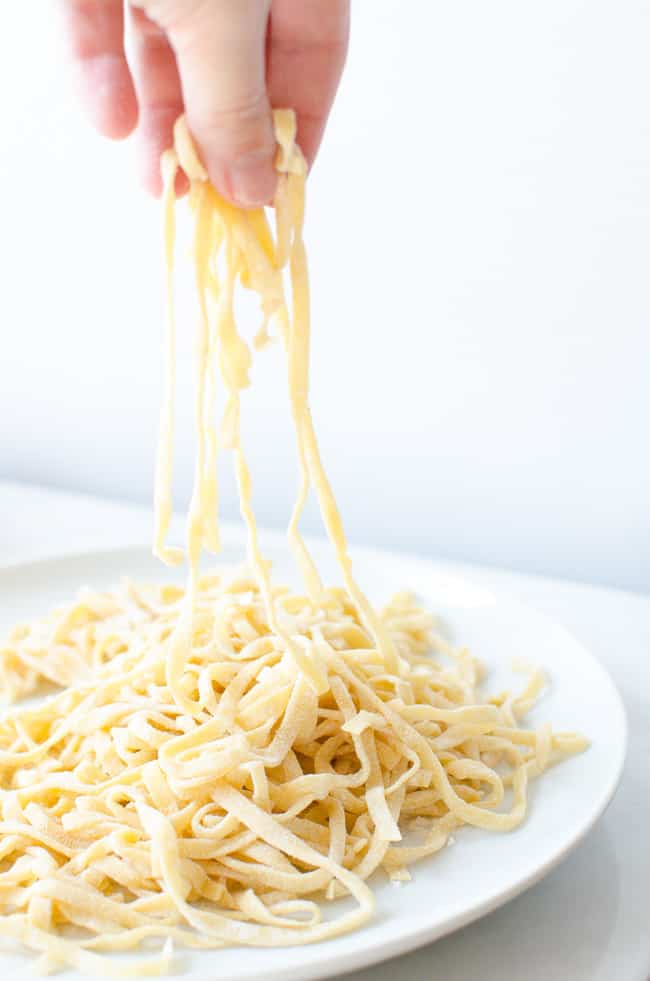
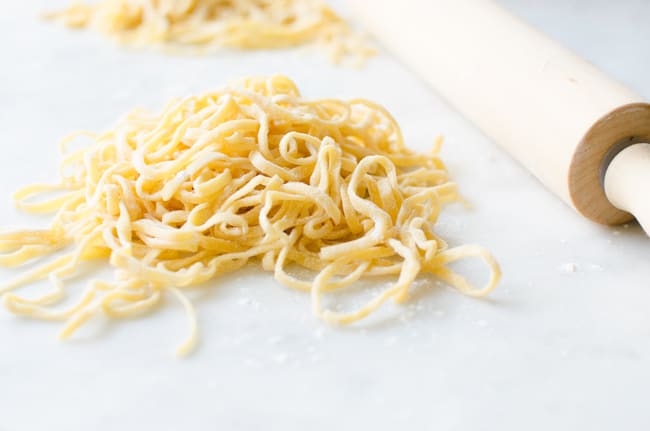
Making pasta is probably one of the most iconic scenes of the Italian culinary tradition. Several decades ago, Italian women used to regularly make pasta from scratch, as did my great aunt and grandmother. All they needed were eggs, flour, a rolling pin…and strong arms.

Times have changed since then and life has become much busier. These days, even the average Italian family finds it easier to grab a package of tagliatelle from the pasta aisle. There’s nothing wrong with pre-packaged pasta. I, myself, buy it in bulk when I’m able to find my favorite brand. Store bought is fast and convenient, but it’s not as good as the one you can make at home, from scratch. Like for many other foods, the fresh stuff is always better.

Luckily, in some Italian households this art is still preserved, practiced, and handed down from one generation to another. Growing up, I watched my great aunt and my mother making tagliatelle noodles every once in a while. There was usually a really nice sauce to go with it, one that called for fresh pasta–like ragù or duck sauce. We typically used an electric machine and making pasta was a fun activity: I was in charge of covering the freshly rolled noodles with dishtowels to prevent them from drying out. As I helped, my mother never failed to point out: “See? It’s so easy to make! You only have to remember to use one egg for every hundred grams of flour”. That was pretty much the dose for one generous serving–it was a fairly easy recipe, and that ratio stuck with me immediately.

Following my mother’s suggestion, I replaced half flour with semolina flour in order to get a more rustic and hearty texture. Semolina flour is sold in most grocery stores. If you can’t find it, it’s okay–just use all purpose flour and stick to the 100g/1 egg rule and you’ll be fine. The recipe is super simple and the technique can be learned quickly. Once you get the basics, you’ll be able to make it with more confidence and, sooner than you can imagine, you’ll start stashing it in your freezer (granted it’s always better to eat it fresh!).

Needless to say, I’ll soon share a recipe for a nice sauce to go with your homemade pasta. In the meantime, have fun getting covered in flour and working out those forearms!

Fresh Egg Pasta | veryEATalian
Fresh Egg Pasta | veryEATalian-4
Fresh Egg Pasta | veryEATalian-9
Fresh Egg Pasta | veryEATalian-10
Fresh Egg Pasta | veryEATalian-5
Fresh Egg Pasta | veryEATalian-12
Fresh Pasta - Tutorial 8
Fresh Egg Pasta | veryEATalian-01

HAND-ROLLED FRESH EGG PASTA – PASTA ALL’UOVO TIRATA A MANO
Servings: 2 | Prep/rest time: approx 1 hr 15 min| Cook time: 2-5 min (varies based on thickness)

INGREDIENTS
100 g (3.5 oz) all purpose flour (or even better, finely milled Italian flour – “Farina Tipo 00”)
100 g (3.5 oz) semolina flour
2 large eggs
1 pinch coarse salt (optional)

COMBINING
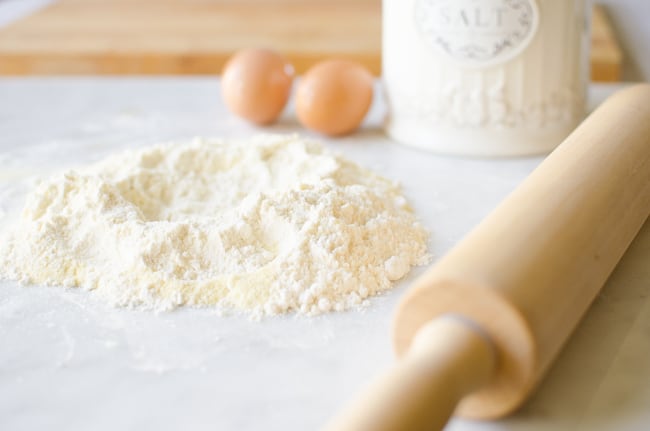
1. Sift together semolina flour and all purpose flour on a clean working surface and form a well in the center.
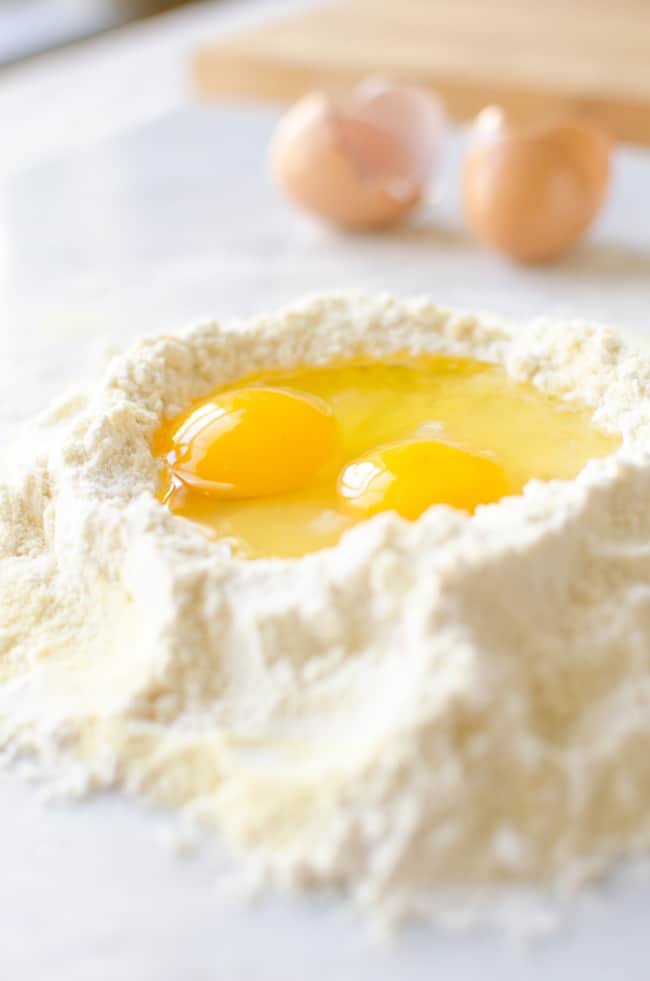
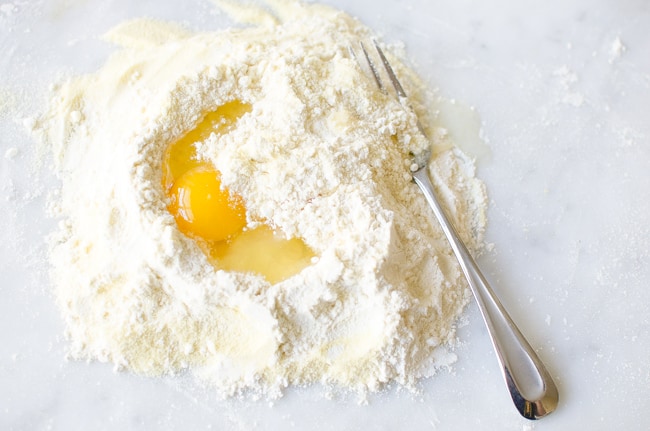
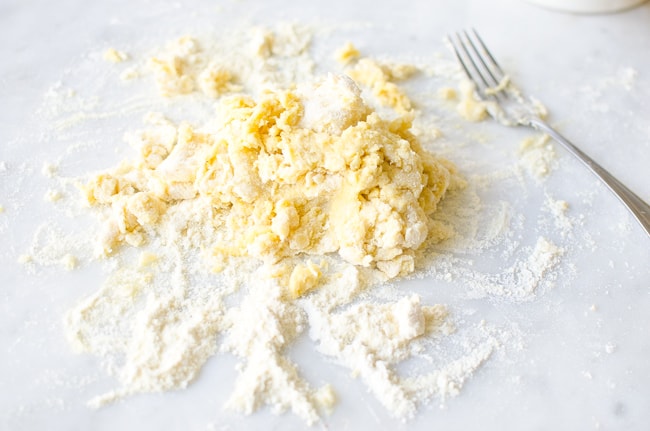
2. Crack eggs into the center and add a pinch of salt. Start mixing eggs with a fork, gradually drawing the flour from the borders towards the center.

KNEADING
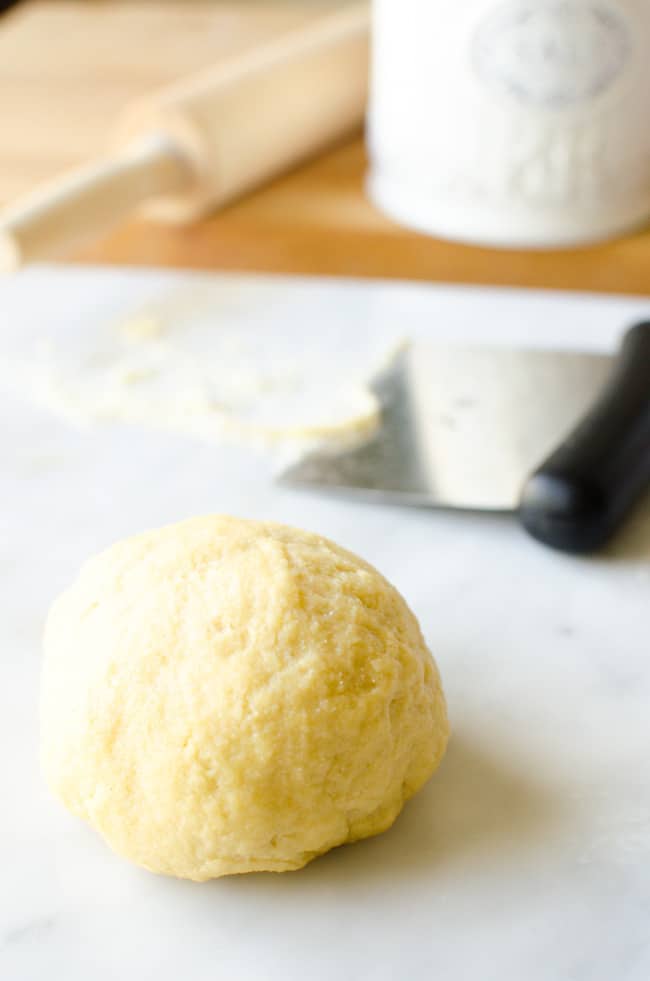
3. Bring all the dough lumps together with your hands and start kneading for about 10 minutes, until you obtain a smooth dough ball.
– Some factors like humidity and the size of the eggs can impact the moisture level of the dough and you’ll probably need to adjust the quantity of flour: don’t incorporate all the flour, if the dough won’t take it; on the other hand, if the dough is too sticky, gradually add small quantities of flour until you achieve the ideal texture.
-Kneading is the hardest part and the dough may seem hard to work at first. Don’t be alarmed; the dough will soften up once it has rested. You can also bang it on the work surface to help make it more elastic.

RESTING
4. Wrap the dough tightly in plastic wrap and let it rest at room temperature for at least 30 minutes.

ROLLING
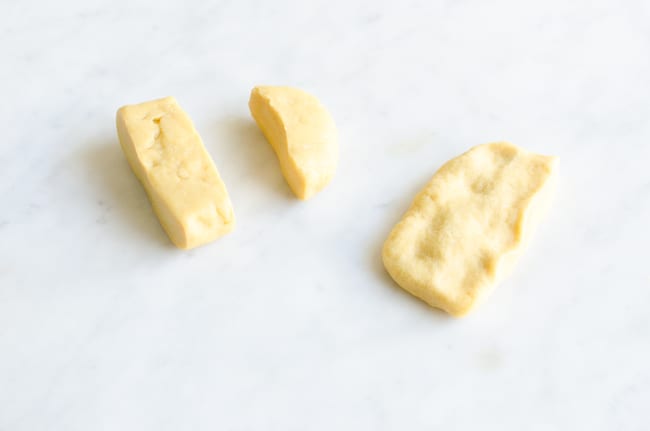
5. Once the dough has rested, divide it into 2 or 3 pieces. Take one piece and wrap the other ones in plastic wrap to prevent them from drying out.
6. Flatten the dough piece with your hands into a circular or rectangular shape.
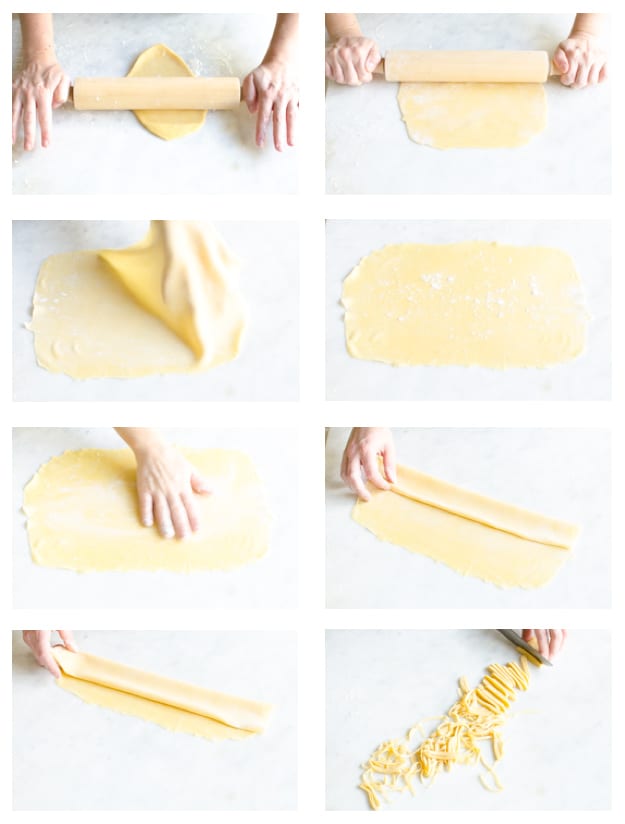
7. Lightly dust the dough with flour and roll it out with the rolling pin, applying pressure from the center forward, and releasing the pressure as you return back to the center. Repeat a couple of times. Turn dough disk 90 degrees (to ensure even thickness and shape) and lightly dust it with flour again (to prevent from sticking to surface or rolling pin). Repeat all these steps, until you obtain a very thin and elastic dough. If you are making lasagne, tagliatelle or tagliolini, roll dough to slightly less than  .5 mm, which is a bit thinner than a credit card. If you are making ravioli, roll it even thinner.

CUTTING
8. Take rolled dough disk and dust it generously with flour. Take one side and fold a strip about 1 1/2 inches, then fold it again over itself until you run out of dough (see photos). Slice the folded dough into strips as wide as you prefer. You can cut your pasta into a variety of widths, for the following shapes:
Tagliolini –> less than 1/8″ wide
Tagliatelle –>1/4″ wide
Pappardelle–> between 5/8″ and 3/4″ wide
9. Generously dust noodles with flour (or semolina flour) and place them on a tray lined with parchment paper and dusted with flour, until ready to be cooked.

Repeat the same steps for the remaining pieces of dough.

FEW MORE NOTES…
– Pasta dough gets dry pretty fast and once you roll it, you should cut it right away. If you don’t, cover it  with a clean dishtowel.
– I recommend cooking fresh pasta right away but you can also freeze it. First, let it harden on a tray lined with parchment paper; then, store it in a freezer bag.

Filed Under: Pasta & Gnocchi Tagged With: egg pasta, eggs, Fresh Pasta, lasagne, pappardelle, pasta, scratch, semolina flour, tagliatelle, tagliolini, tutorial

  • « Previous Page
  • 1
  • …
  • 10
  • 11
  • 12
  • 13
  • 14
  • Next Page »
  • Bloglovin
  • Facebook
  • Instagram
  • Pinterest
  • Tumblr
  • Twitter

WELCOME!

WELCOME!

I'm Lisa and this is where I like to share Italian recipes and stories about my Italian family. If you'd like to learn more about me, head over to my About page.
[F O L L O W • M E • O N • B L O G L O V I N' ]

Recipes from Friuli Venezia Giulia
Creamy Polenta with Grana Padano Cheese Fondue | Very EATalian

More Posts from this Category

Pasta & Gnocchi

Spaghetti with Tuna, Lemon and Creamy Stracciatella, Cheese | Very EATalian
Simple and flavorful Pasta e Ceci (Pasta with Chickpeas) | Very EATalian
Orecchiette with Sausage, Broccoli Rabe, and Sun-dried Tomatoes | Very EATalian
Butternut squash ravioli with sage and amaretti cookie crumbles

More Posts from this Category

Sweets & Dessert

Ciambelle al Vino: Crunchy Wine Cookies | Very EATalian
Jam-filled Pasta Frolla Cookies! Buttery, sweet and tart, they're versatile and perfect for Valentine's Day!
Crostoli: a perfectly crisp Carnevale Treat | Very EATalian

More Posts from this Category

Thanksgiving in Italy

September: time to harvest grapes to make “Il Vino del Nonno”

Trip to Sicily

Tasting Frittelle in Venice

Behind the Scenes of a Grappa Distillery

Behind the Scenes of an Artisanal Fresh Pasta Shop

STAY CONNECTED!
  • Bloglovin
  • Facebook
  • Instagram
  • Pinterest
  • Tumblr
  • Twitter
All recipes, written content, and photographs on this website have been created exclusively for Very EATalian (unless otherwise noted) and are protected by copyright. You may not use any content from this website for commercial use without express permission from the author.
Creative Commons License
This work is licensed under a Creative Commons Attribution-NonCommercial-ShareAlike 3.0 Unported License.

© 2025 Very EATalian. All rights reserved